The protection of Excel sheet is a valuable security feature that helps prevent accidental or unauthorized changes to your documents. It ensures that only approved users can edit formulas, formatting or critical manuscript. Sometimes you may need to unprotect an Excel spreadsheet whether because you have forgotten the password, inherited a locked file or need to update protected files. Let us walk you through secure methods to unprotect an Excel sheet with or without the password while minimizing risks to your records. Regain access correctly whether using built-in Excel features, workarounds for older files, or trusted recovery tools.
Method 1: Unprotect a Sheet When You Know the Password
Step 1 Launch the Protected Workbook
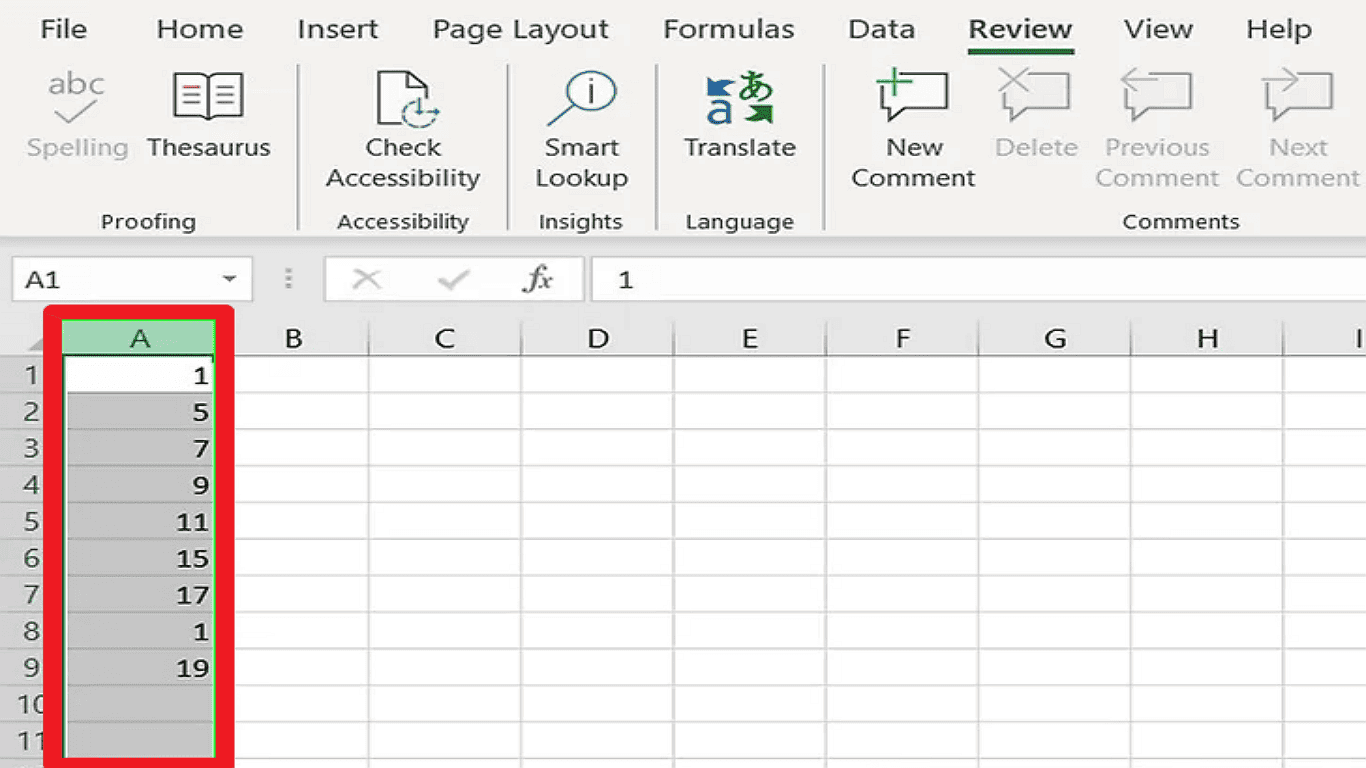
Open Microsoft Excel and locate and double-click your protected Excel file to open it. The file will appear with protected sheets indicated (some versions show a padlock symbol)

Step 2 Access the Sheet Protection Options
Look at the bottom of your Excel window to find the sheet tabs. Identify the protected sheet you want to unlock (may have a lock icon). Right-click on the specific sheet's tab to open the options menu
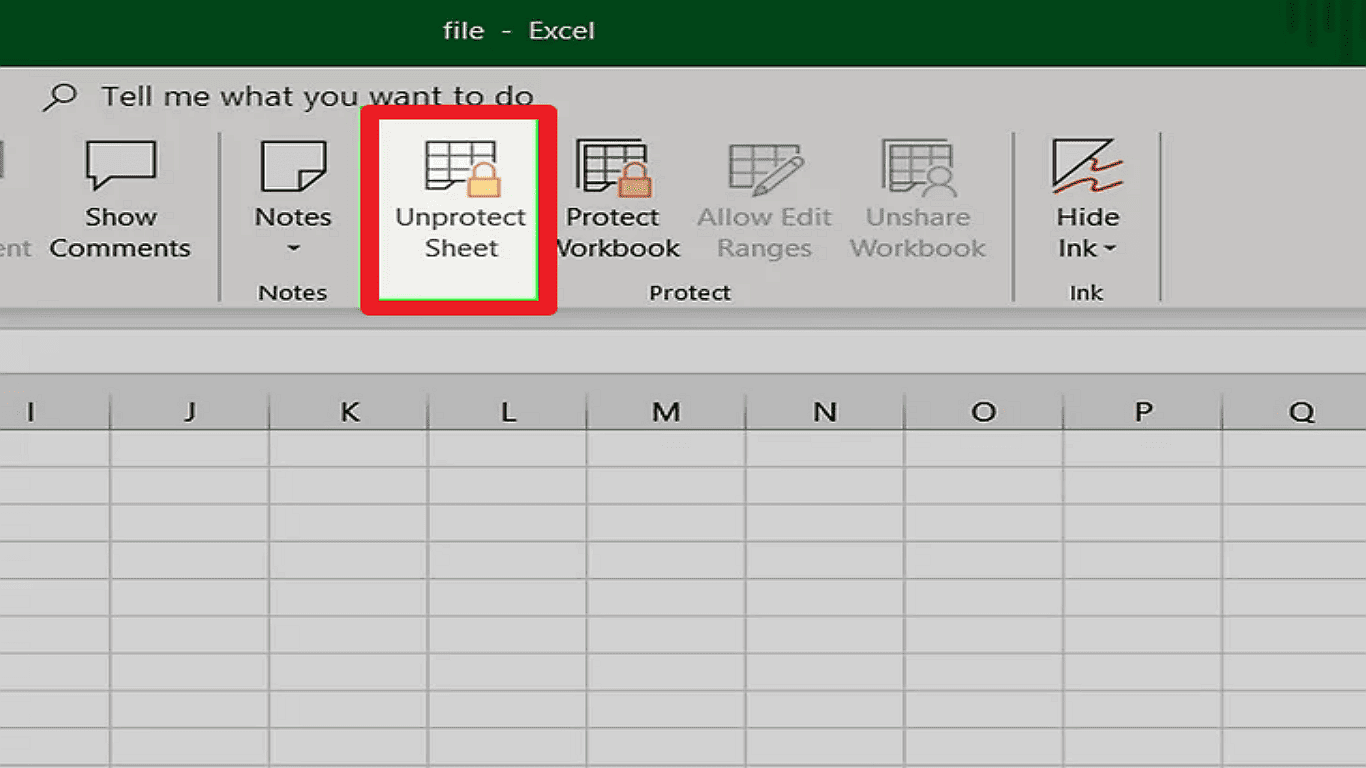
Step 3 Remove Sheet Protection
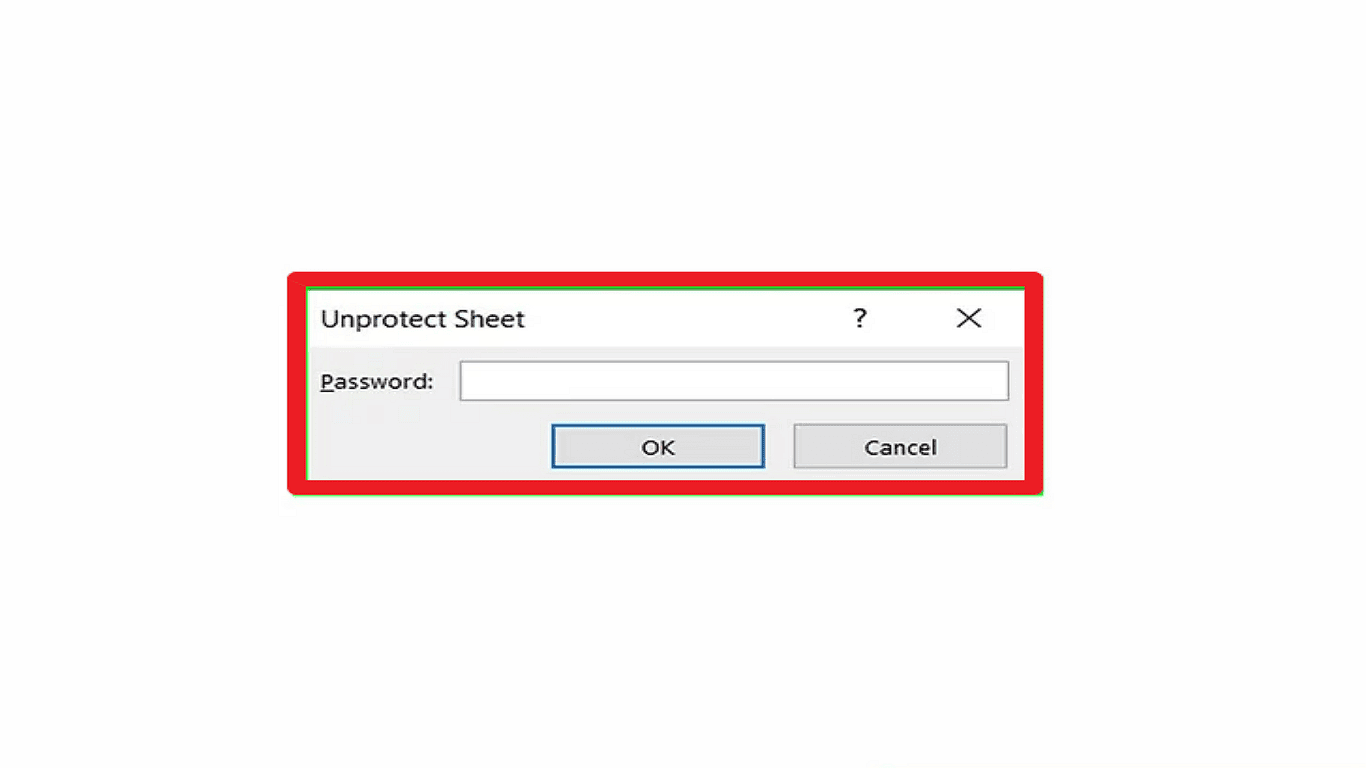
From the right-click menu, select “Unprotect Sheet”. If no password is set, the sheet will unlock immediately. For password-protected sheets, a prompt will appear requesting the password
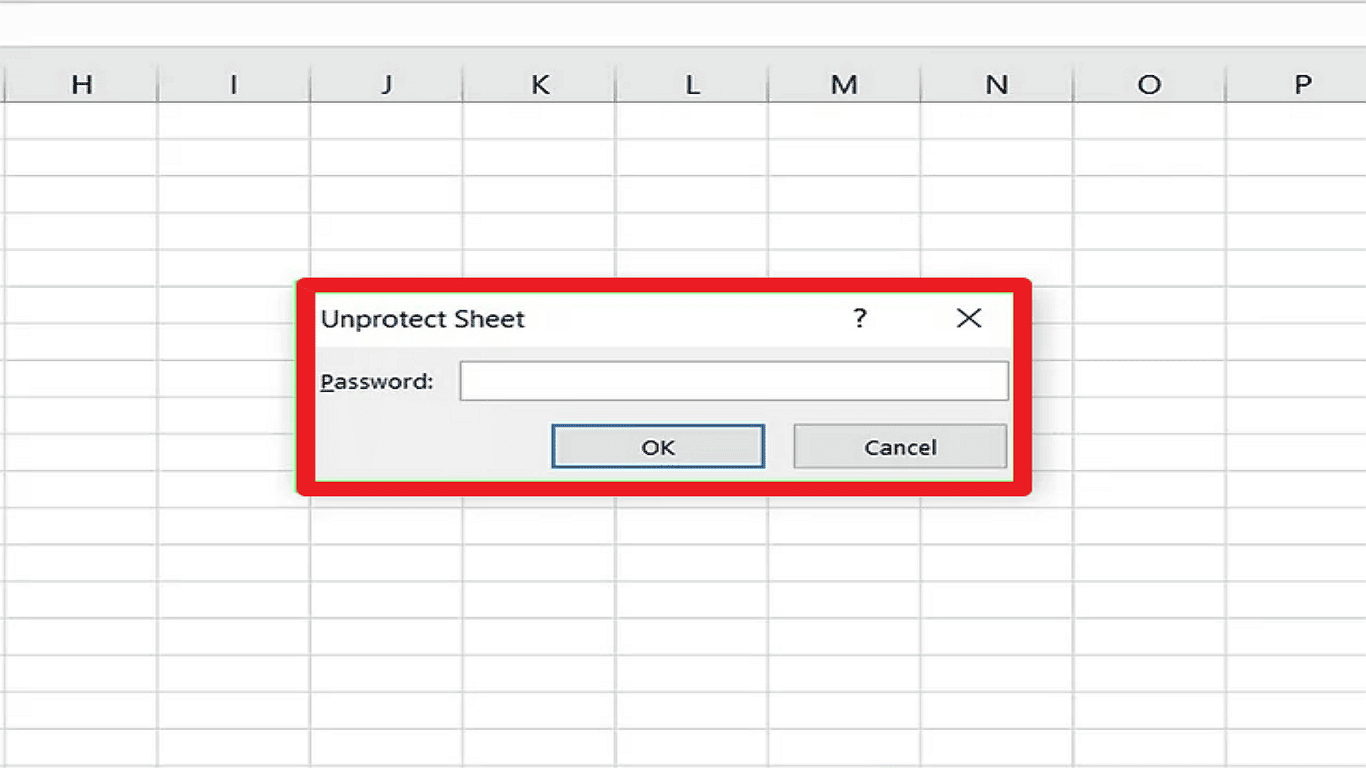
Step 4 Enter Your Password
Carefully type in the correct password in the dialog box and click "OK" to confirm and remove the protection. The sheet is now fully editable (repeat for other protected sheets if needed)
Note: Each protected sheet must be unlocked individually. If you're working with multiple protected sheets, repeat this process for each one. Ensure you have proper authorization before removing protection from shared or company files.
If you've forgotten the password, try uploading the Excel file to Google Sheets - it automatically removes protection when converting the file. For Excel 2010 or earlier, you can use a VBA code to unlock sheets without needing online tools. Both methods preserve your original data while removing protection, but only use them on files you're authorized to access. The Google Sheets method is simpler, while VBA works better for older .xls files.
Method 2: Remove Excel Protection Using Google Sheets
Google Sheets can help unlock protected Excel files if you don't know the password.
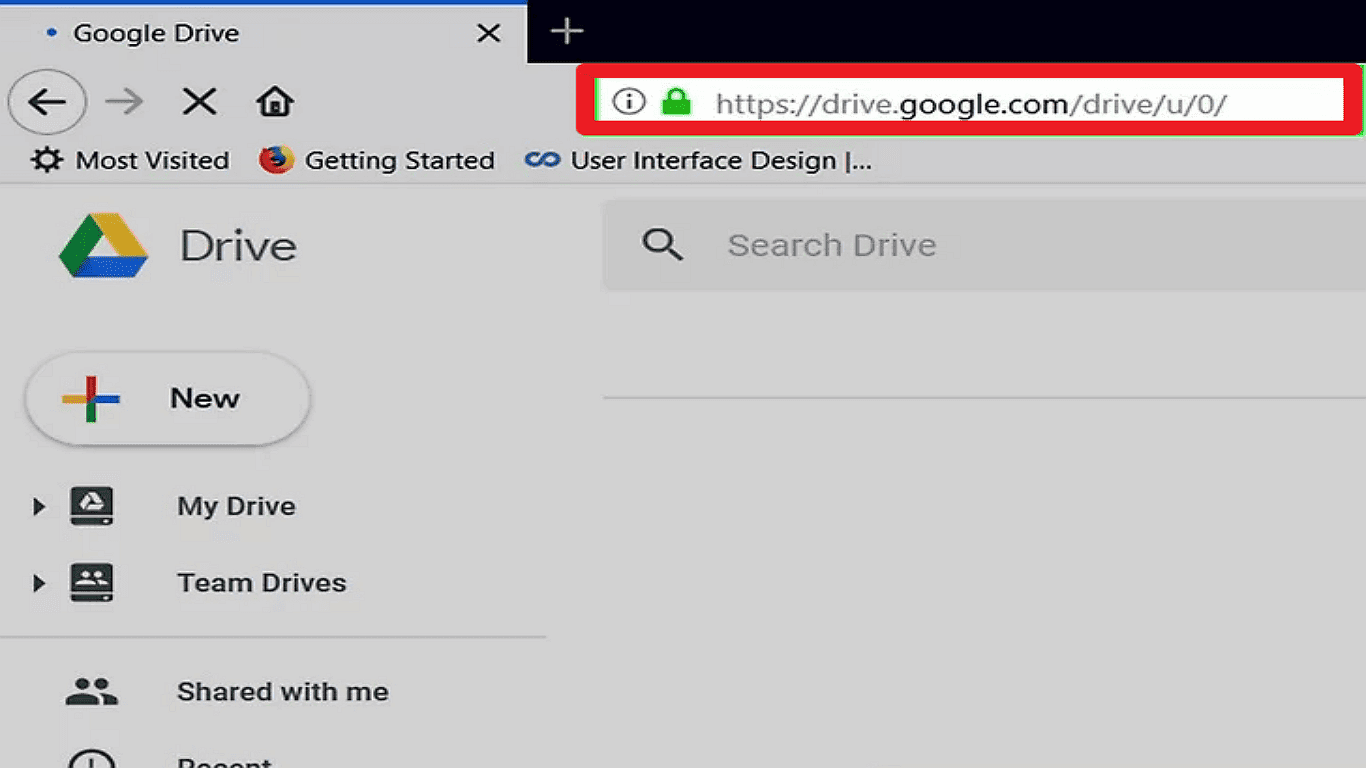
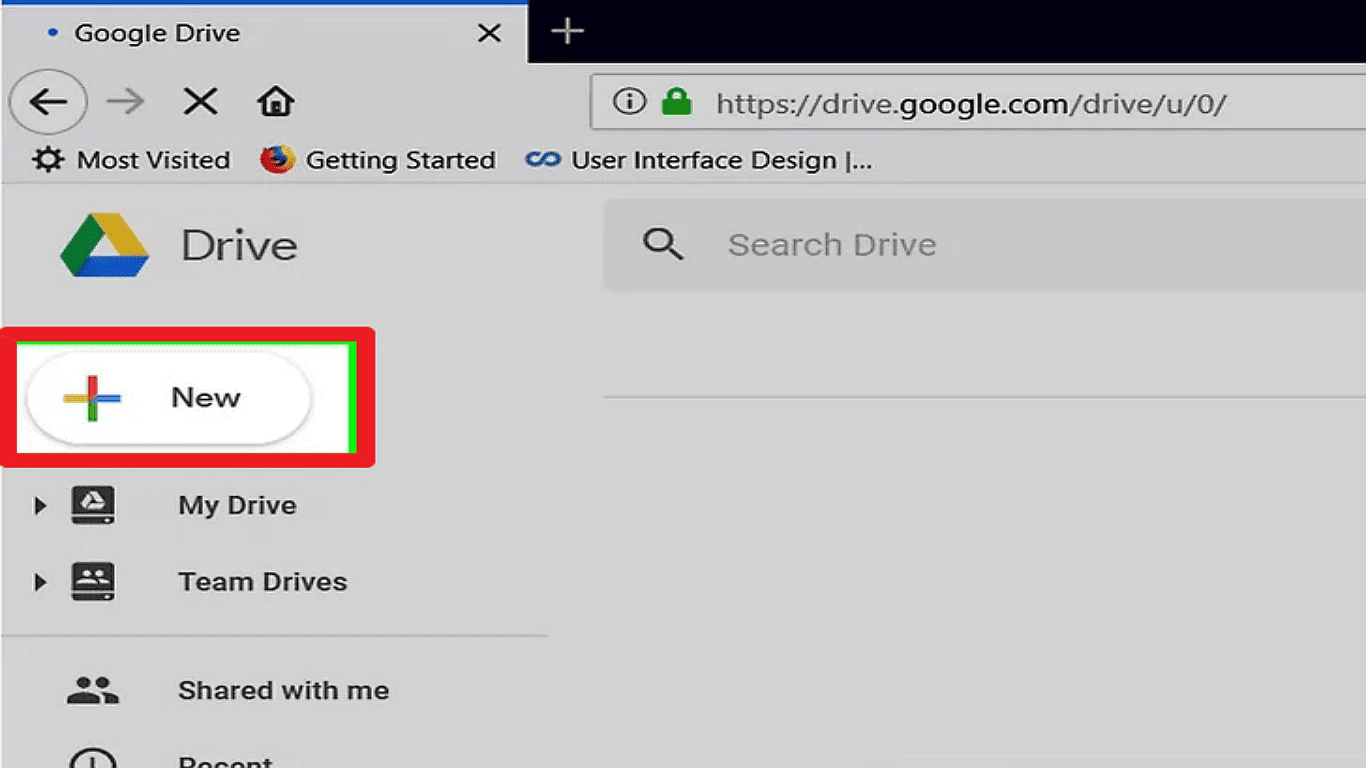
Step 1 Access Google Drive
Open your web browser and go to Google Drive. Now sign in with your Google account and if you don't have, first create a new account.
Step 2 Upload the Protected Excel File
In the top left corner of Google Drive click the New button.
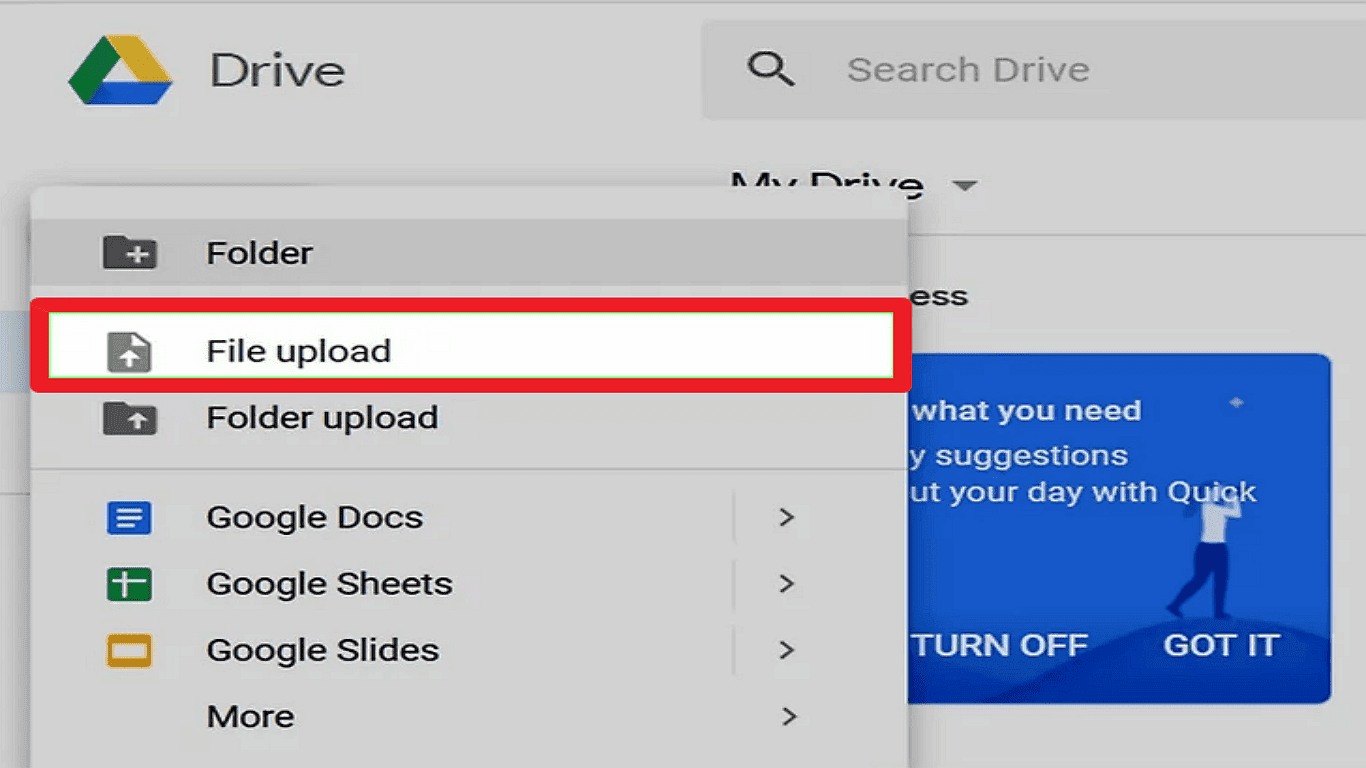
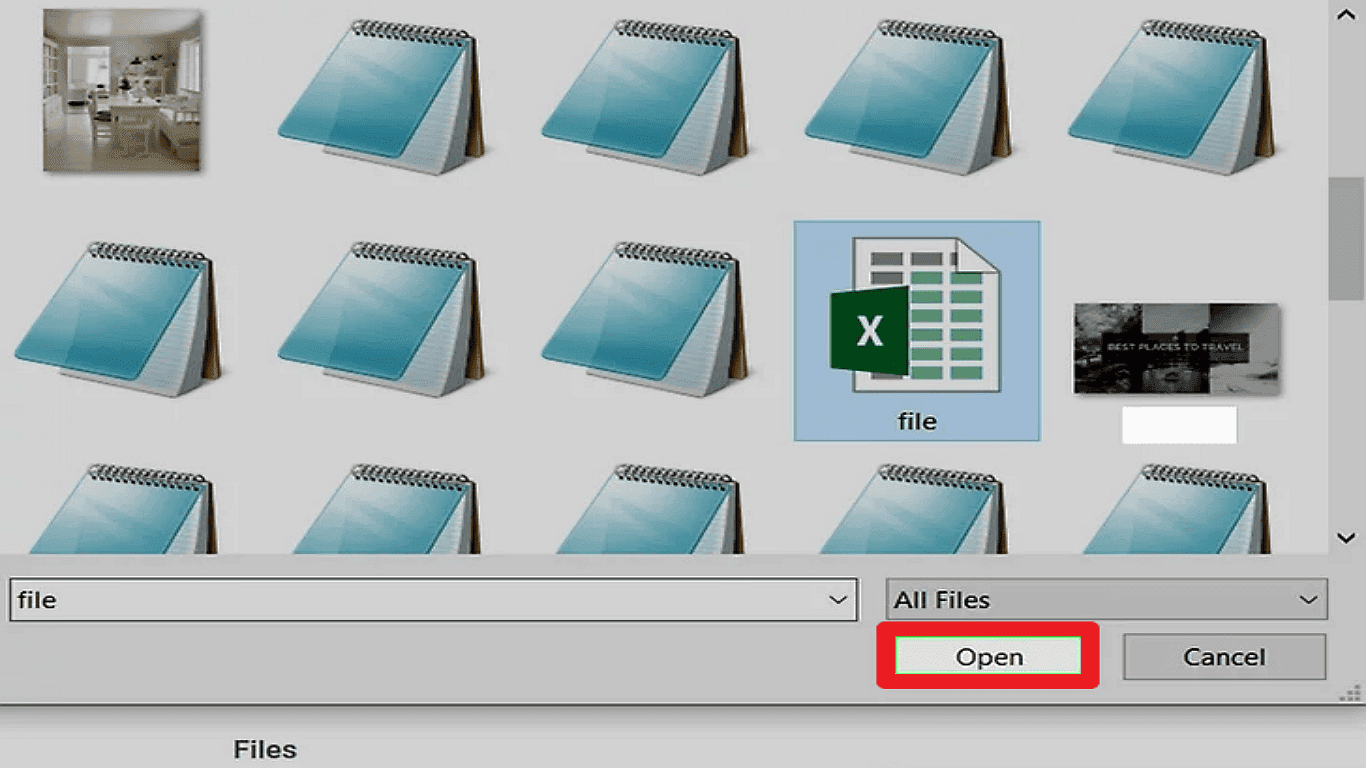
Now select File Upload from the dropdown menu and browse your computer. Choose the password protected Excel file and click Open to upload your file.
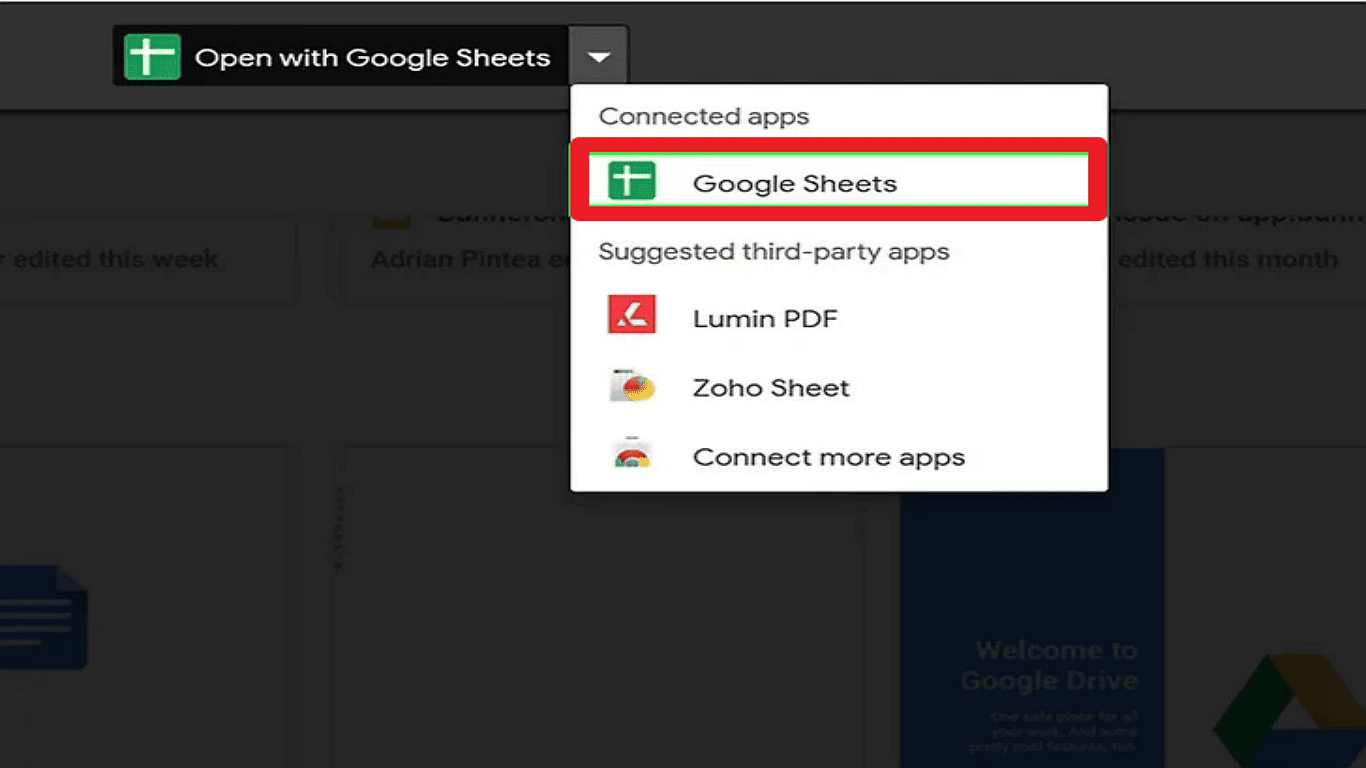
Step 3 Open the File in Google Sheets
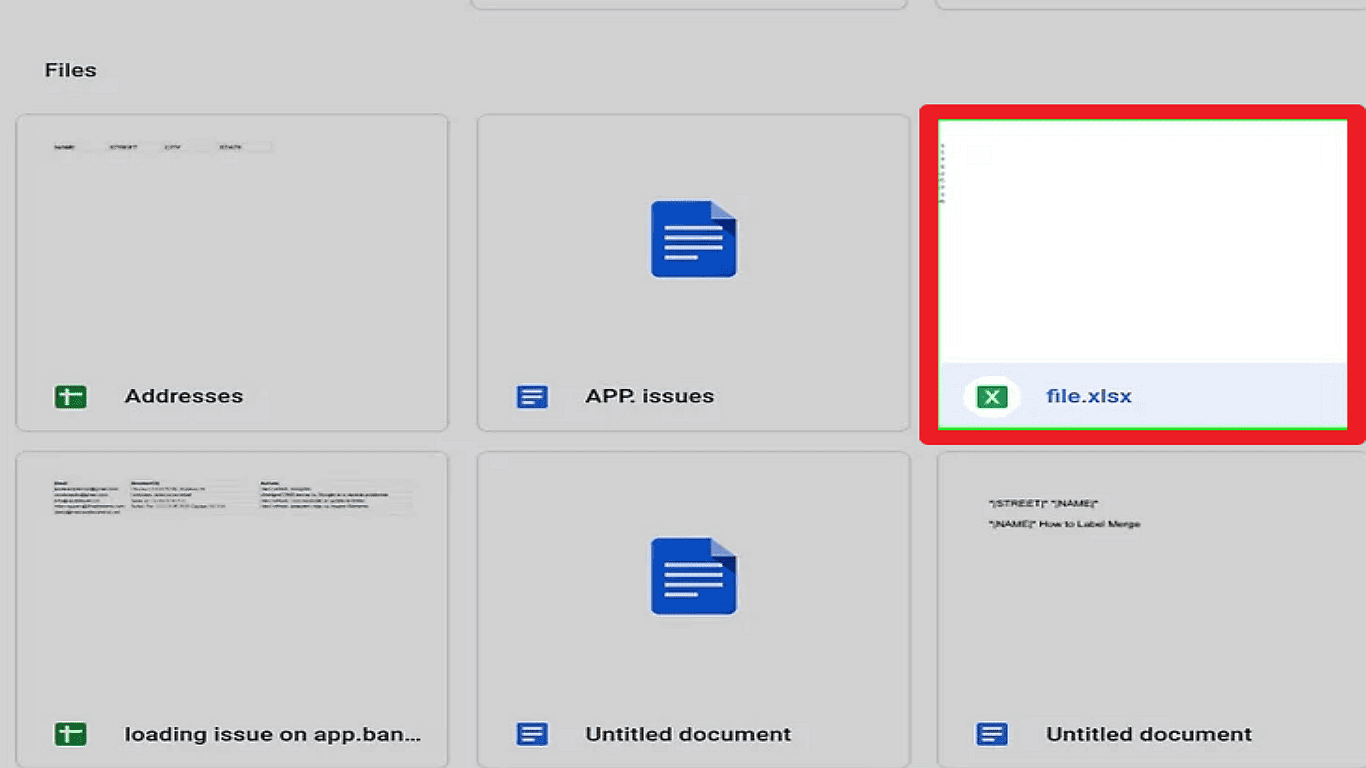
Once uploaded, locate the Excel file in your Google Drive. Double click to open a preview.
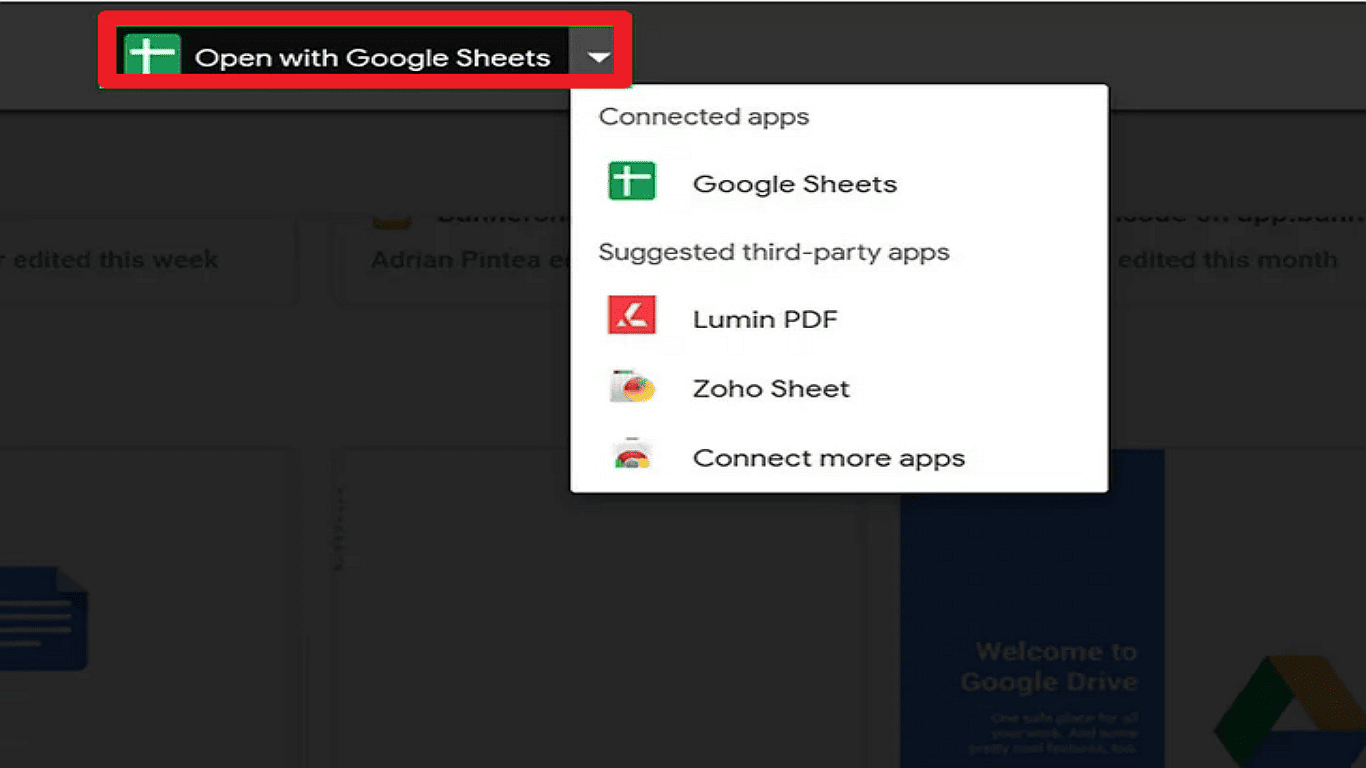
At the top of the preview, click "Open with" and choose "Google Sheets" from the options.
Step 4 Download the Unprotected File
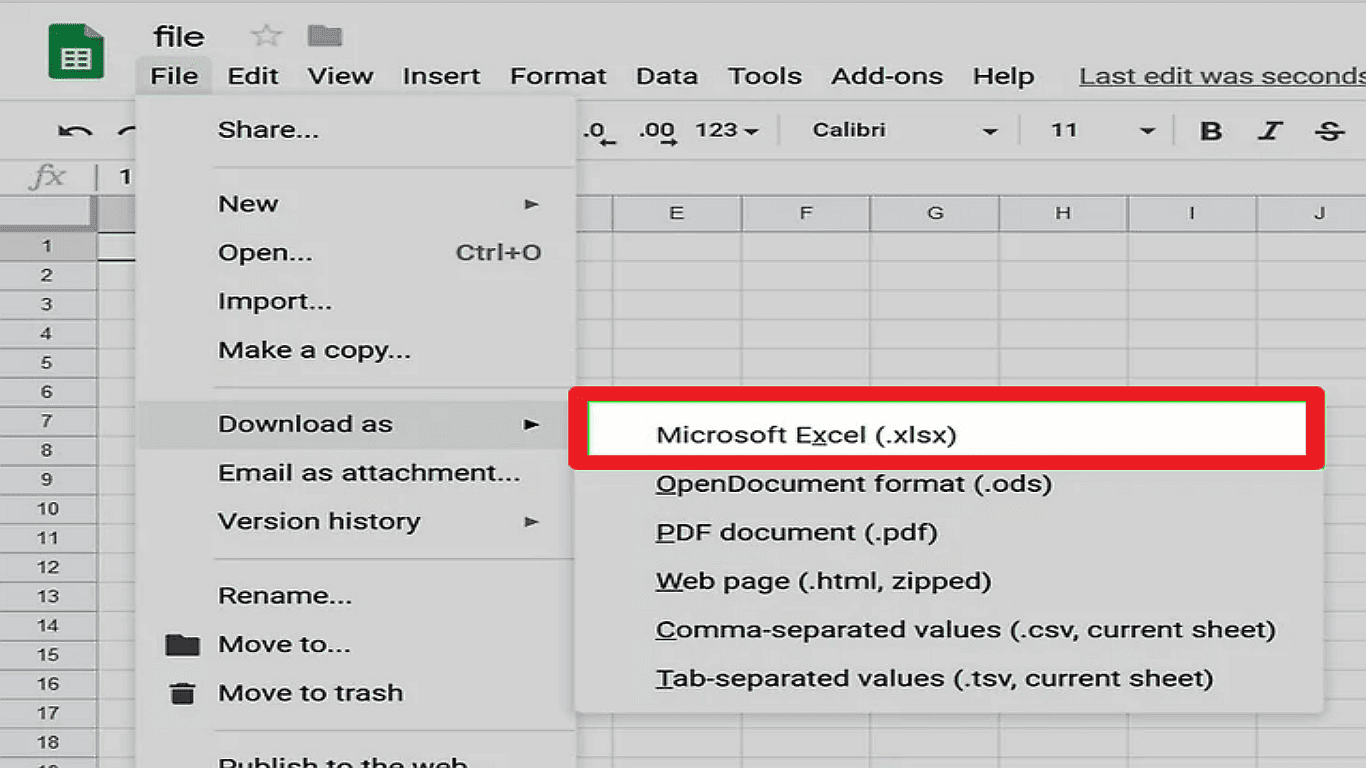
After the file opens in Google Sheets. Go to the File menu.
Select Download and then choose Microsoft Excel (.xlsx).
Save the file to your computer—it will now be unprotected.
Important Notes:
This method removes sheet-level protection but may not work for workbook-level security. Always ensure you have permission to edit the file before proceeding.
Method 3: Unprotecting Excel Sheets Using VBA (For Excel 2010 and Earlier)
In this method we use Visual Basic for Applications or VBA to remove worksheet protection in 2003-2010 or older Excel versions. Remember that Microsoft patched this vulnerability in Excel 2013 and later versions too.
Step 1 Preparing Your File
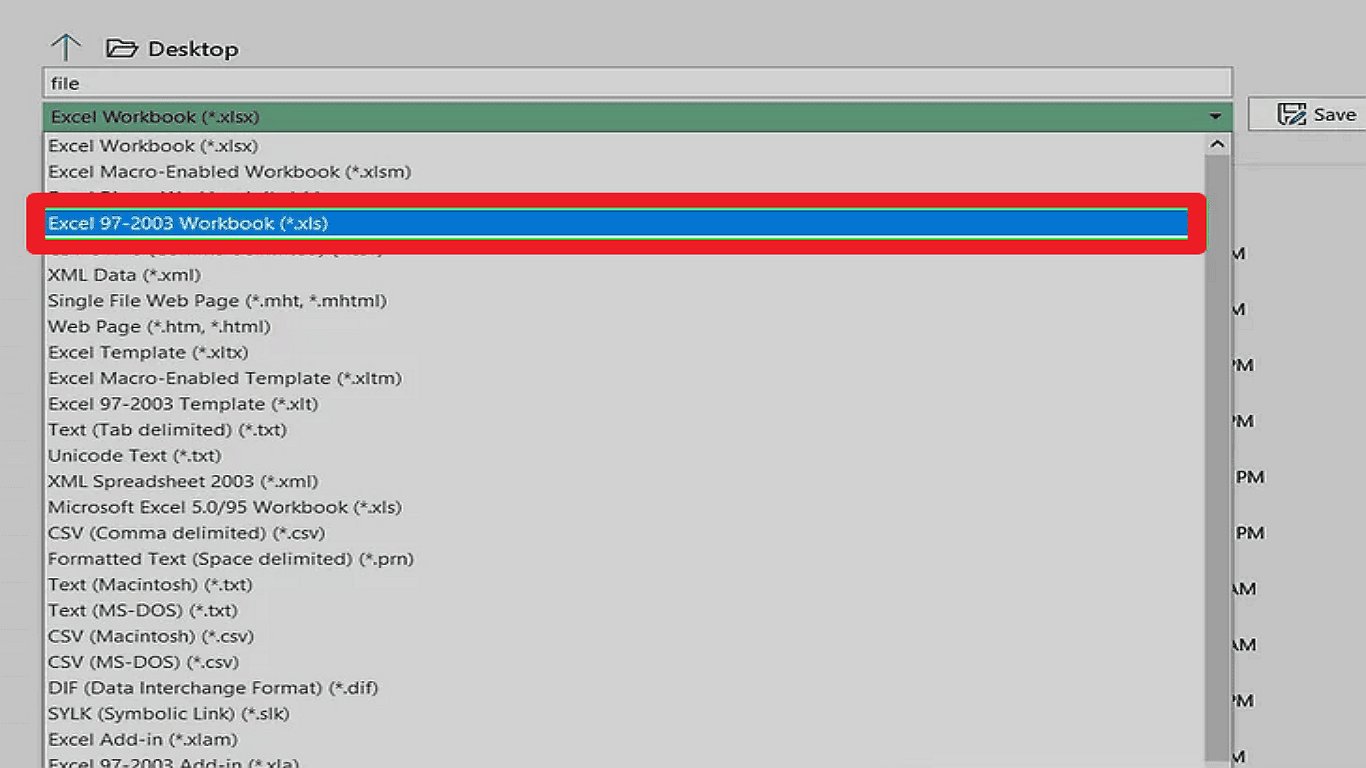
Begin by opening your protected Excel workbook. If your file has a .xlsx extension, you must first convert it to the legacy .xls format.

Go to File > Save As, select "Excel 97-2003 Workbook (*.xls)" from the file type dropdown, and save a copy.
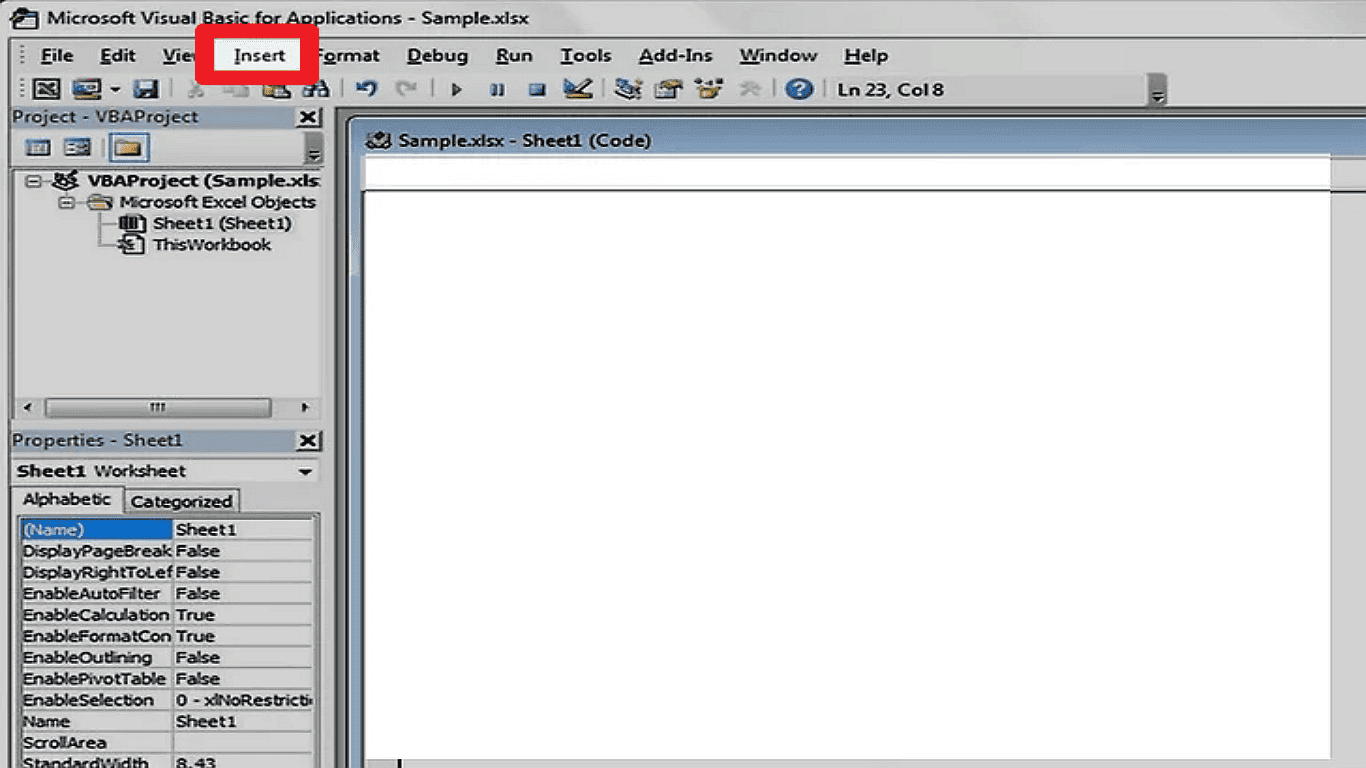
Step 2 Accessing the VBA Editor
Press Alt+F11 to open the Visual Basic Editor.

Right click your workbook's name ending with .xls and select Insert > Module in the Project Explorer pane. It is usually on the left side.
It creates a new code module.
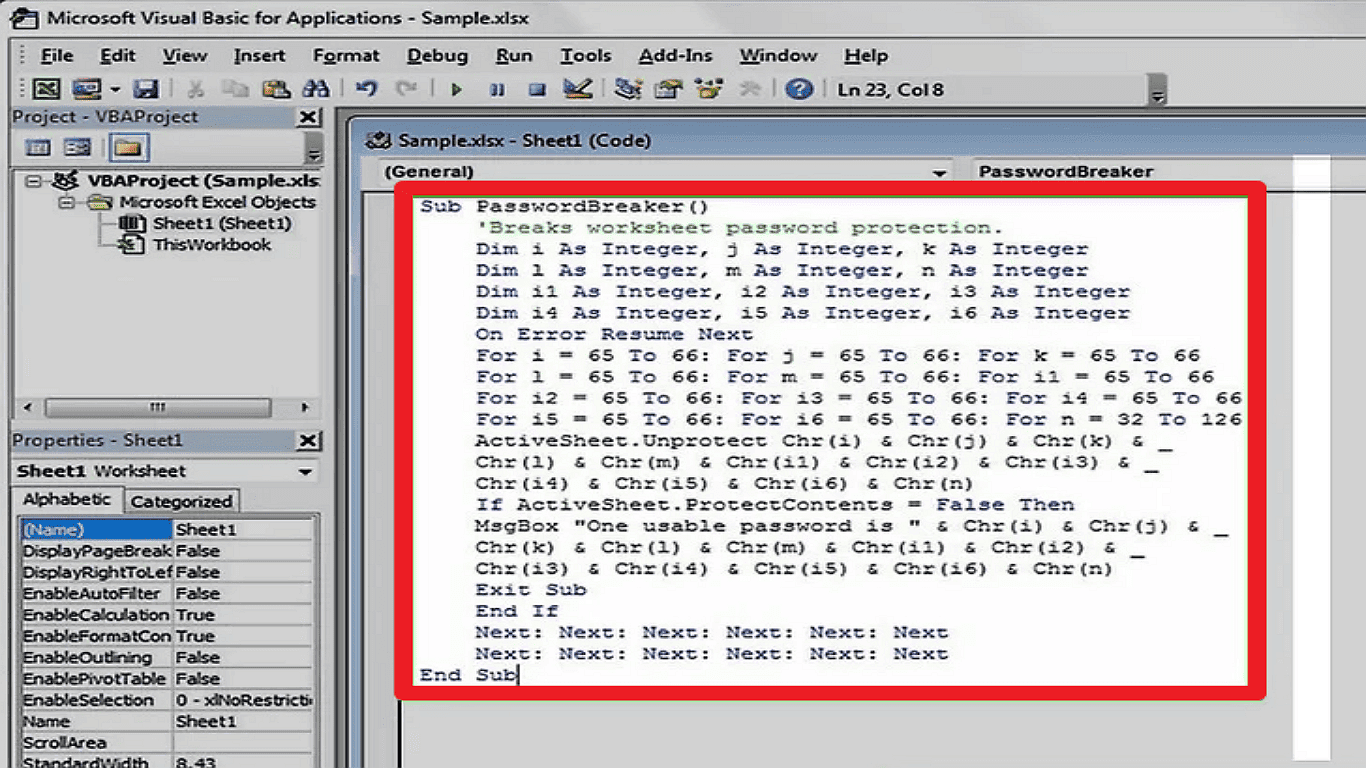
Step 3 Entering the VBA Code
Copy and paste the following exact code into the module window:
Sub PasswordBreaker()
    'Breaks worksheet password protection
    Dim i As Integer, j As Integer, k As Integer
    Dim l As Integer, m As Integer, n As Integer
    Dim i1 As Integer, i2 As Integer, i3 As Integer
    Dim i4 As Integer, i5 As Integer, i6 As Integer

    On Error Resume Next
    For i = 65 To 66: For j = 65 To 66: For k = 65 To 66
    For l = 65 To 66: For m = 65 To 66: For i1 = 65 To 66
    For i2 = 65 To 66: For i3 = 65 To 66: For i4 = 65 To 66
    For i5 = 65 To 66: For i6 = 65 To 66: For n = 32 To 126
        ActiveSheet.Unprotect Chr(i) & Chr(j) & Chr(k) & _
        Chr(l) & Chr(m) & Chr(i1) & Chr(i2) & Chr(i3) & _
        Chr(i4) & Chr(i5) & Chr(i6) & Chr(n)
        If ActiveSheet.ProtectContents = False Then
            Exit Sub
        End If
    Next: Next: Next: Next: Next: Next
    Next: Next: Next: Next: Next: Next
End Sub
Step 4 Executing the Code
Press F5 to run the macro.

The code will attempt various password combinations and may take several minutes to complete. When successful, it will remove protection without revealing the original password.
Step 5 Final Steps
After the sheet is unprotected, you can save the file. If you converted it earlier, save it to .xlsx format for better compatibility with newer Excel versions.

The VBA approach exploits how older Excel versions stored password hashes, allowing the code to test combinations until protection is removed systematically. While effective, it requires enabling macros and should be used cautiously.
Method 4: Using an Online Password Removal Service
Certain online services can help if you need to unprotect an Excel file but don't have the password:
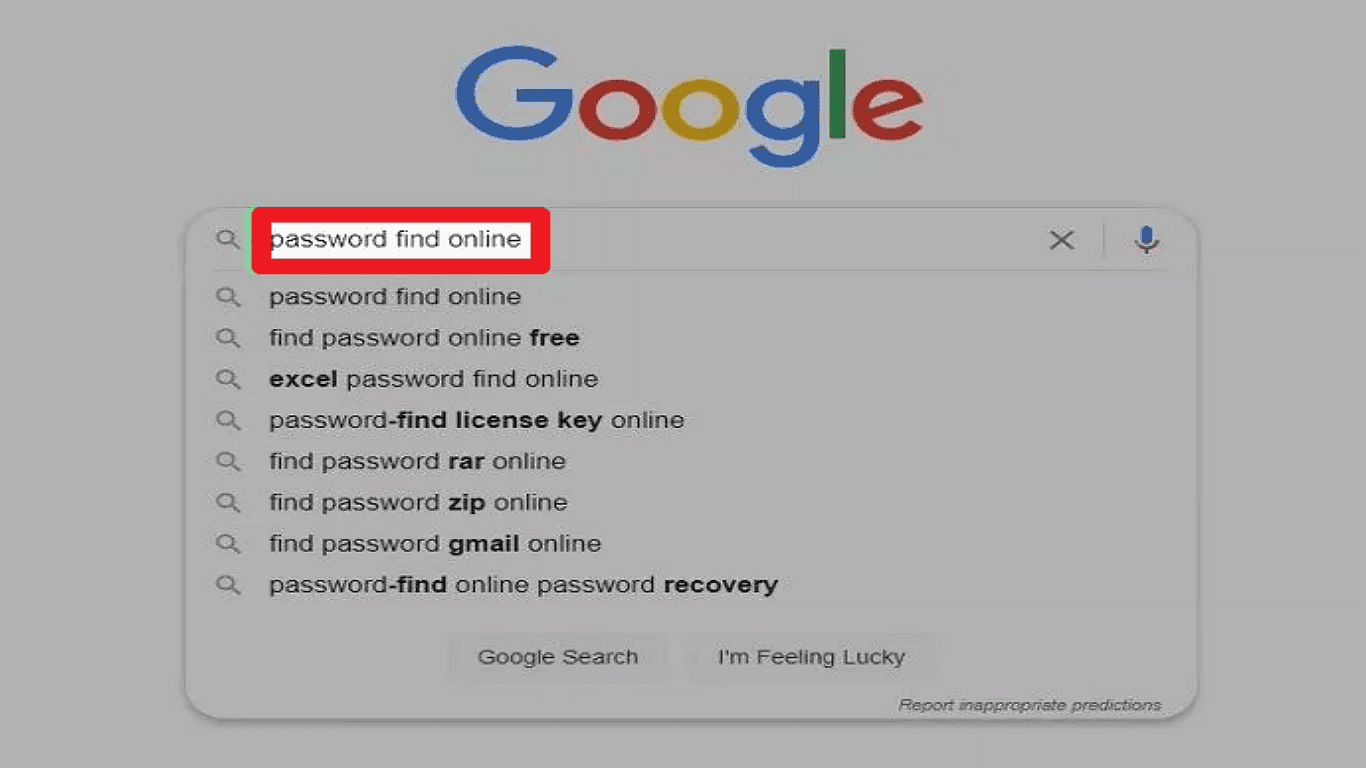
Step 1: Find a Reliable Online Service
Search for "Excel password removal online" to find a reputable service. Look for platforms with positive reviews and clear privacy policies.
Step 2: Upload Your Protected File
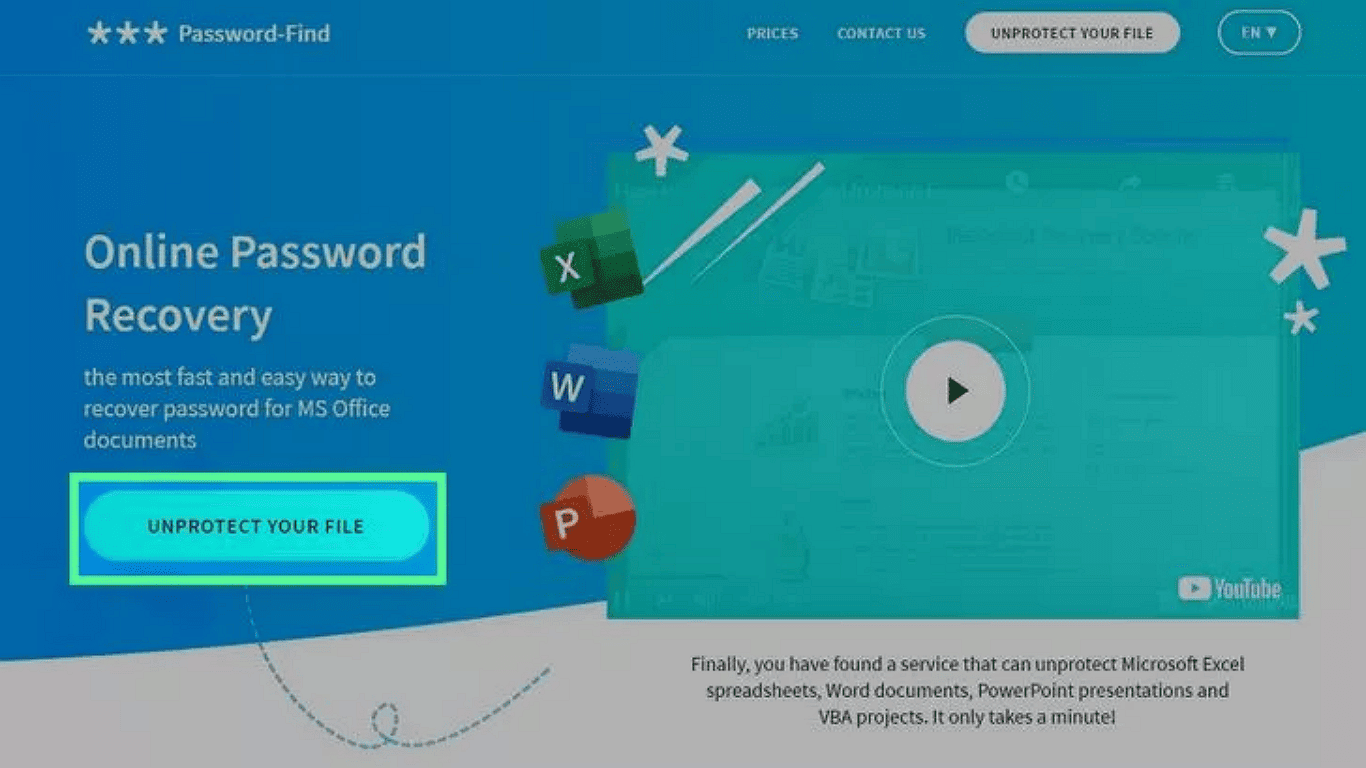
Once on the service's website, click "Unprotect File" or a similar option.
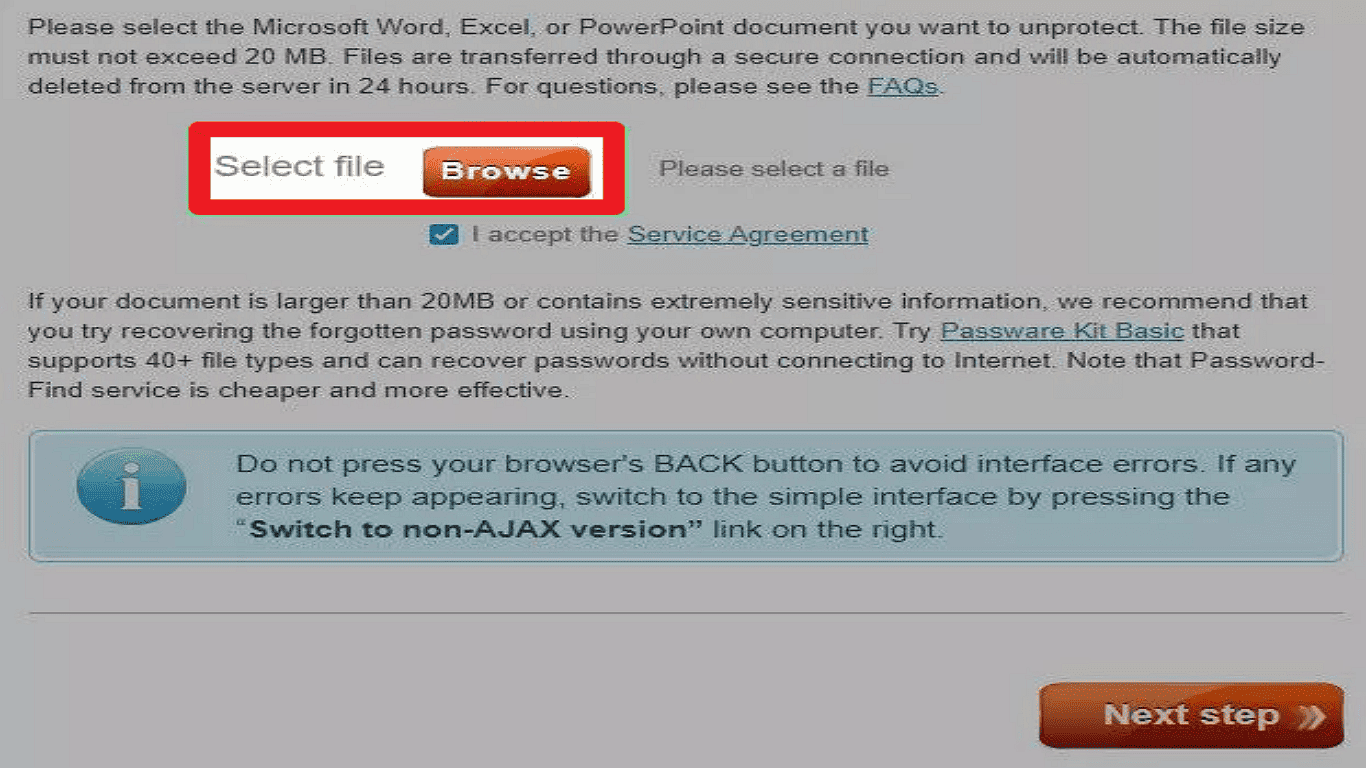
Then, select "Browse" to locate and upload your password-protected Excel file.
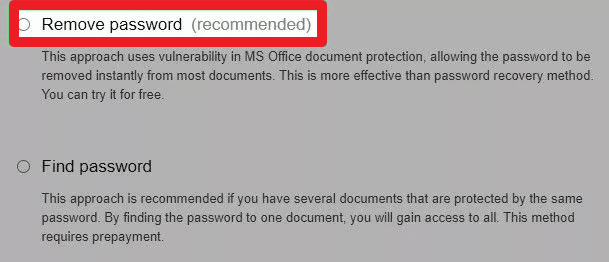
Step 3: Select the Password Removal Option
Choose the "Remove Password" option (often presented as a radio button). Some services may offer additional settings, but the default is usually sufficient.
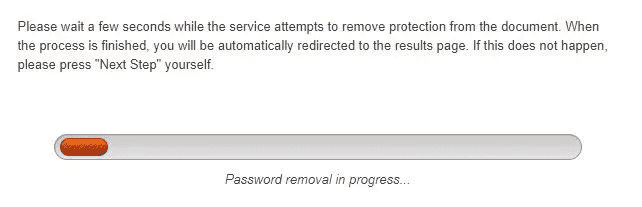
Step 4: Wait for Processing
The service will analyze your file and attempt to remove the password. Depending on file size and protection strength, this may take a few moments.
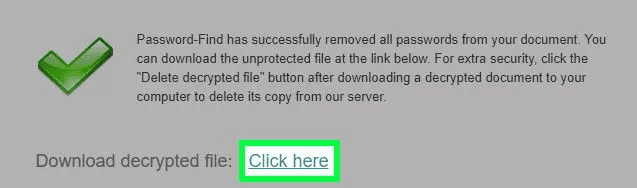
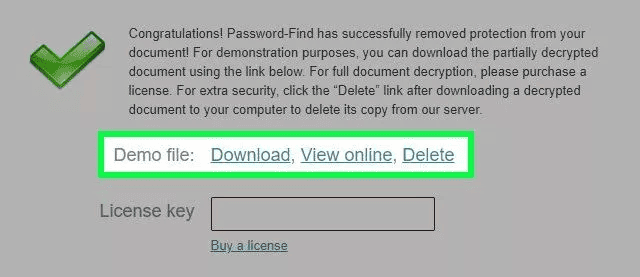
Step 5: Download the Unprotected File
For small files, you can typically download the unprotected version immediately. Larger files may require a license key or payment to access the fully unlocked document. Some services offer a demo version first.
Important Notes:
- Be cautious when uploading sensitive files to online services.
- Free tools may have file size limitations.
- Always verify the legitimacy of the service before use.
This method is convenient but should only be used for files you have permission to modify.
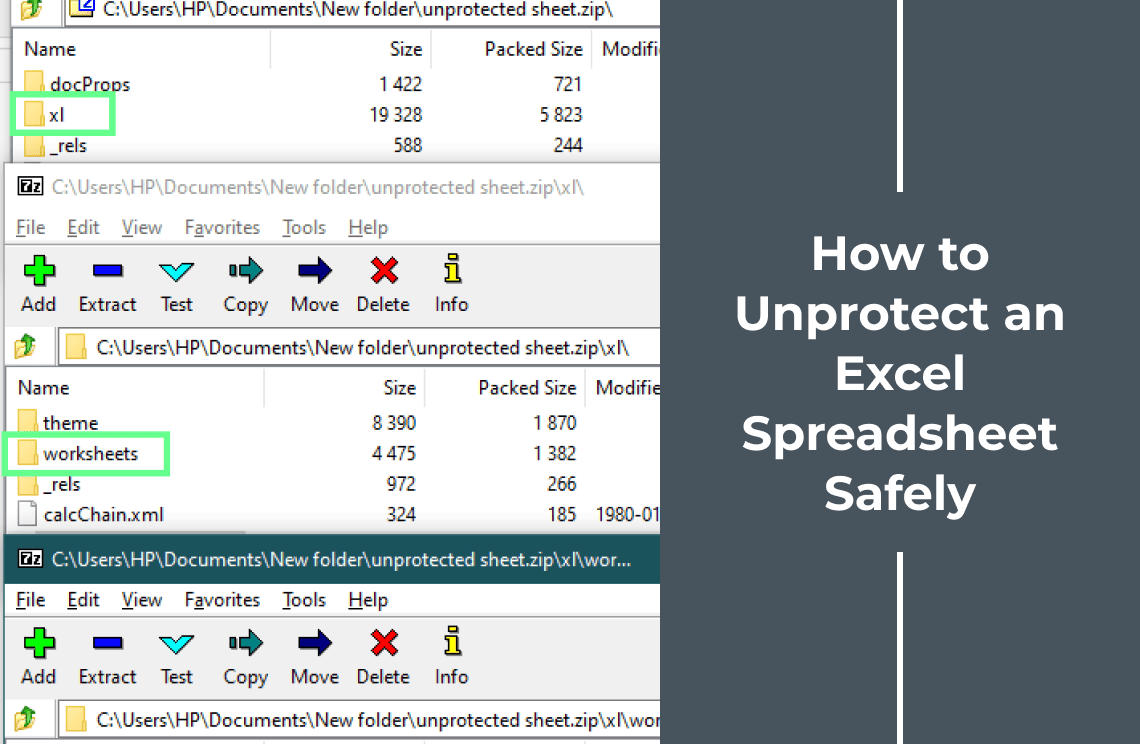
Method 5: Remove Excel Sheet Protection Without Password (.xlsx Files)
Step 1 Create a backup copy to prevent data loss of your Excel file.
You can bypass protection by modifying the file structure for password protected .xlsx files.
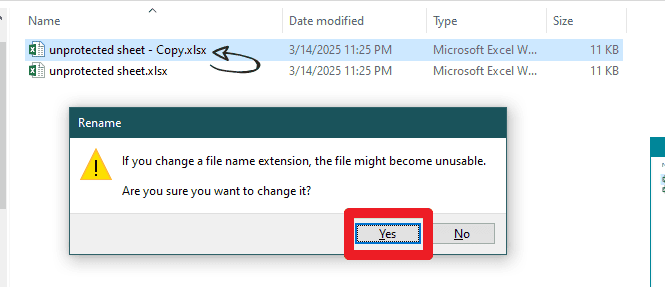
Step 2 Rename the file extension from .xlsx to .zip for internal components access.
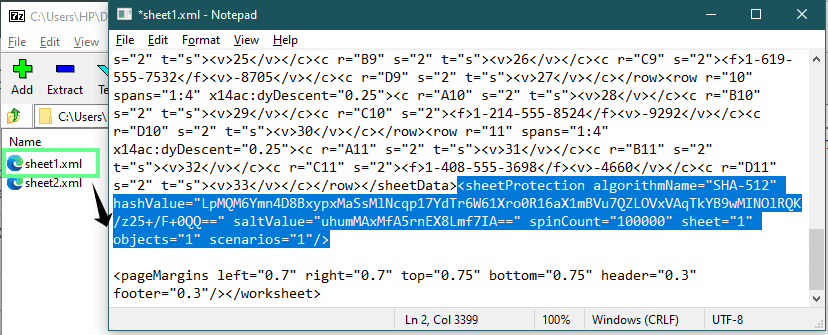
Step 3 Now extract the ZIP archive and navigate the folders to find the worksheet's XML file containing the sheet Protection tag.

Step 4 Carefully remove this protection tag, save your changes, and recompress all files into a ZIP archive.
Step 5 Finally, change the extension back to .xlsx - the sheet protection will now be removed while preserving all your data.
It works because modern Excel files or.xlsx use an open XML format packaged as a ZIP file. However, you can disable the protection by directly editing the XML structure without original password need. Exercise caution when modifying these files as improper changes could corrupt your database. Every time work on a copy of your original file and verify the results after completing the method.
Conclusion
Thus, unprotecting an Excel sheet can be upfront if you know the password. Alternative methods like Google Sheets conversion or VBA scripts can help when you don't have. Must remember to use these techniques ethically and only unlock files you have access permission. For more Excel tips and tricks, you might find helpful resources at PDF Agile's Excel Tips. By following secure practices and keeping backups, you can manage your spreadsheets efficiently without losing access to important data.