That moment when you open your presentation and see misaligned text, cut-off images, or strange empty spaces - we've all been there. More often than not, the problem comes down to one simple setting: your slide size.
Getting this right makes all the difference between a sloppy deck and a professional presentation. Whether you need standard 4:3 slides for older projectors, widescreen 16:9 for modern displays, or custom dimensions for a special project, we've got you covered.
And here's a bonus - proper sizing doesn't just make your presentation look better. It can actually help manage your file size, too, making it easier to share via email or upload to cloud storage. In this guide, I'll walk you through three straightforward ways to adjust your slide dimensions like a pro, plus some smart tricks to keep your file lean and mean.
If you want to fix those formatting headaches once and for all, then read till the end. Let's start.
Method 1: Adjust Slide Size via Design Tab (Quick Presets)
The right slide size makes your presentation look sharp everywhere—from boardroom screens to printed materials. PowerPoint's quick presets (like 16:9 for widescreen or 4:3 for older projectors) let you adapt instantly while keeping your design intact. Ideal for last-minute tweaks or ensuring cross-device consistency, it's the fastest way to professional results.
Best for: Switching between standard (4:3) and widescreen (16:9) formats
Step 1: Open Your Presentation
Launch PowerPoint and open your existing presentation by pressing Ctrl+O or selecting File > Open from the menu.
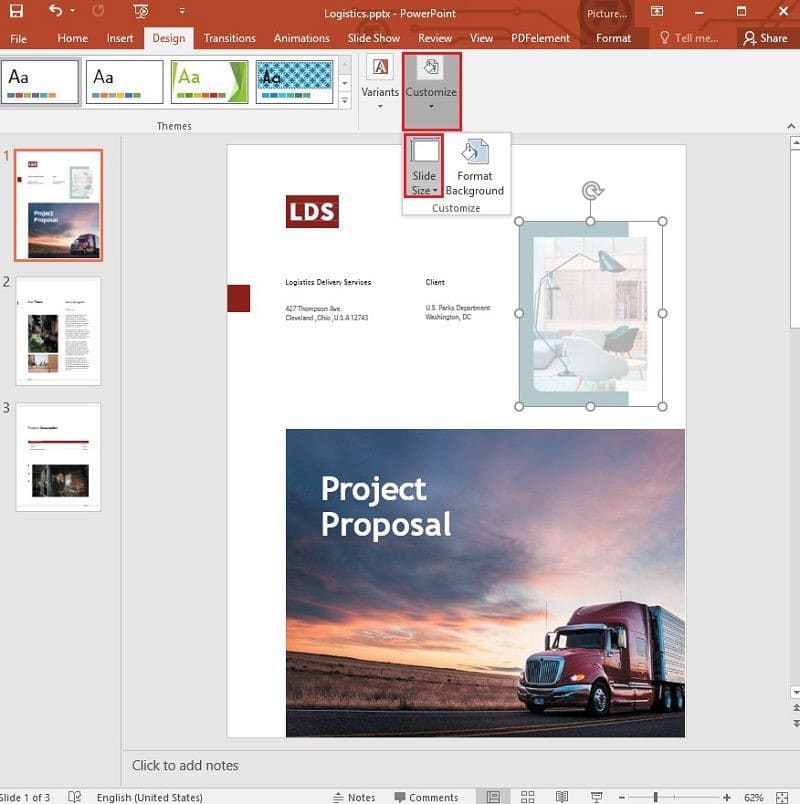
Step 2: Access Slide Size Settings
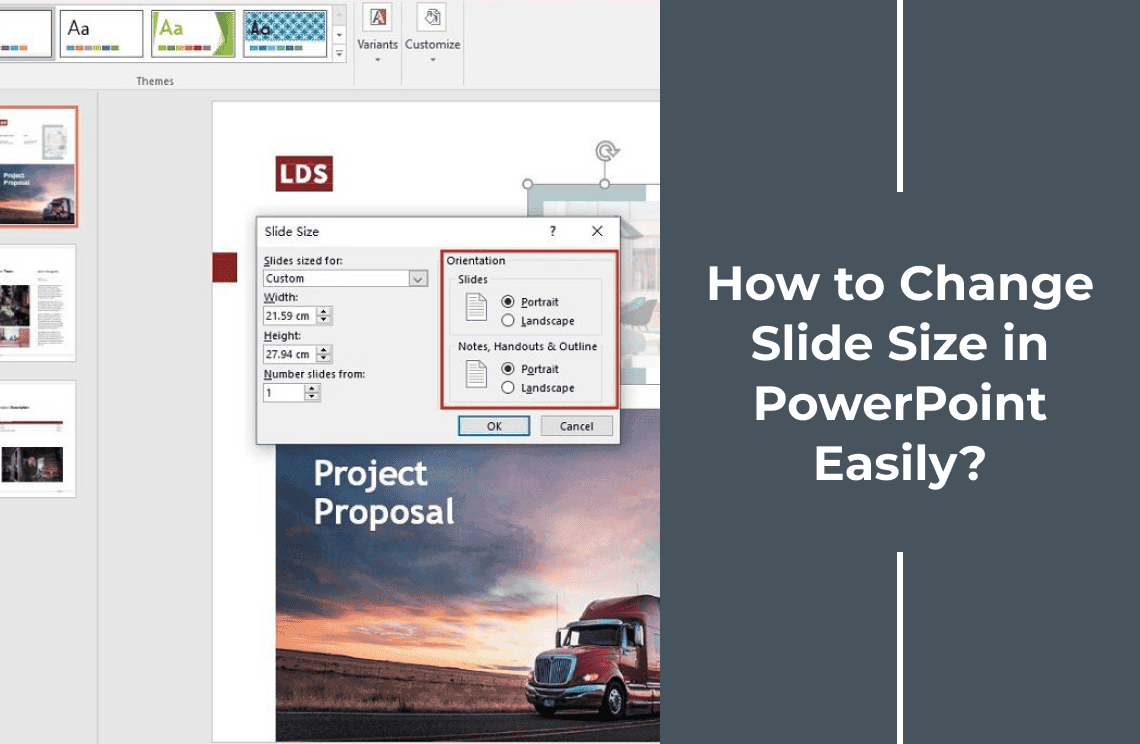
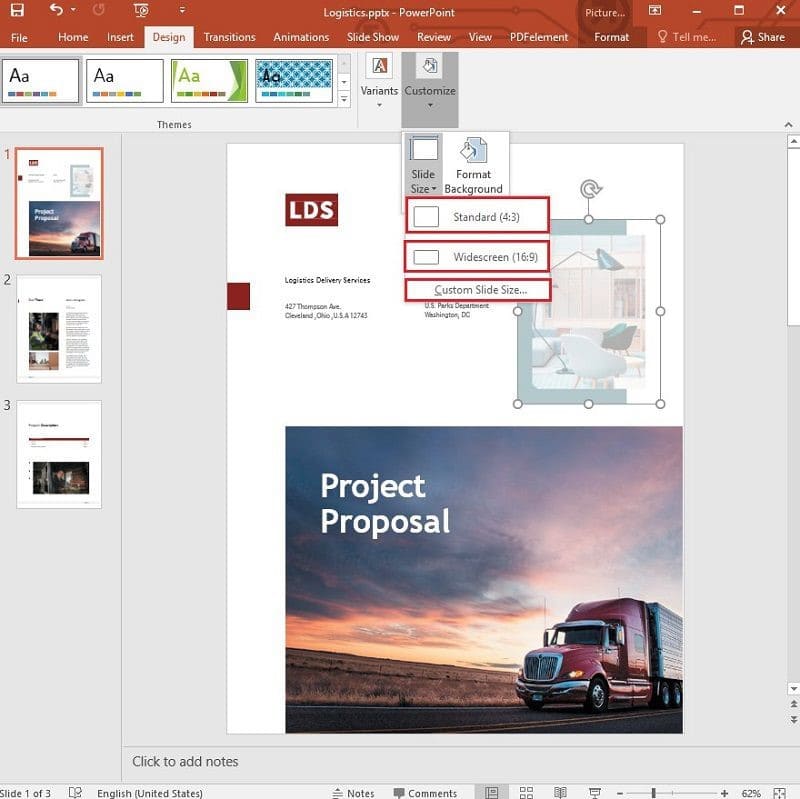
Navigate to the Design tab in the top ribbon. Click the Slide Size dropdown arrow near the far right, then select Custom Slide Size. For quicker access, use the keyboard shortcut Alt+G+S.
Step 3: Choose Your Preferred Dimensions
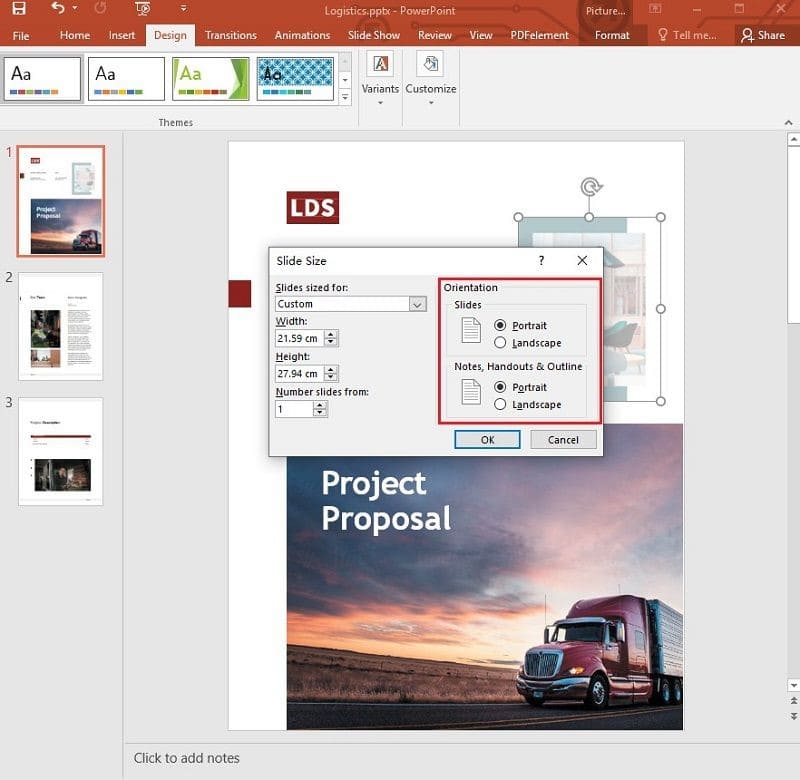
The Slide Size dialog box offers preset options like Widescreen (16:9) for modern displays and videos, or Standard (4:3) for older projectors. For custom dimensions (e.g., print materials), enter exact measurements in inches or centimeters. Below the size options, you can toggle between Landscape (horizontal) or Portrait (vertical) orientation for slides, with separate settings for notes and handouts.
Step 4: Apply and Confirm Changes
After selecting your size, click OK. PowerPoint will prompt you to choose between:
- Maximize (stretches content but may crop edges)
- Ensure Fit (shrinks content proportionally to avoid cropping)
For most users, Ensure Fit is the safer choice.
Pro Tips
Set Default Size:
Save your custom slide size as default via Design → Set as Default for future decks
For Mixed Audiences:
Use 16:9 for digital sharing and 4:3 when presenting with older projectors
Check Projector Specs:
Always verify venue projector dimensions beforehand to prevent unwanted slide cropping
Print Considerations:
Set custom 8.5"x11" size if exporting slides as printable handouts
Preview Always:
Test your slides in Slide Show mode after resizing to catch formatting issues
Method 2: Reduce File Size via Image Compression (Built-In Tool)
Large PowerPoint files clog inboxes and slow down presentations, but you don't need third-party software to fix it. PowerPoint's native compression tool shrinks images to email-friendly sizes (like 96 ppi) while preserving readability, perfect for sharing decks via Outlook, Google Drive, or collaboration platforms. Ideal for image-heavy pitches, training materials, or portfolios, this method ensures swift sharing without sacrificing critical visuals.
Best for: Shrinking bloated presentations without losing critical quality
Step 1: Open Your Presentation
Begin by launching PowerPoint and opening your large presentation file. You can quickly access files using the Ctrl+O keyboard shortcut or through the File > Open menu.
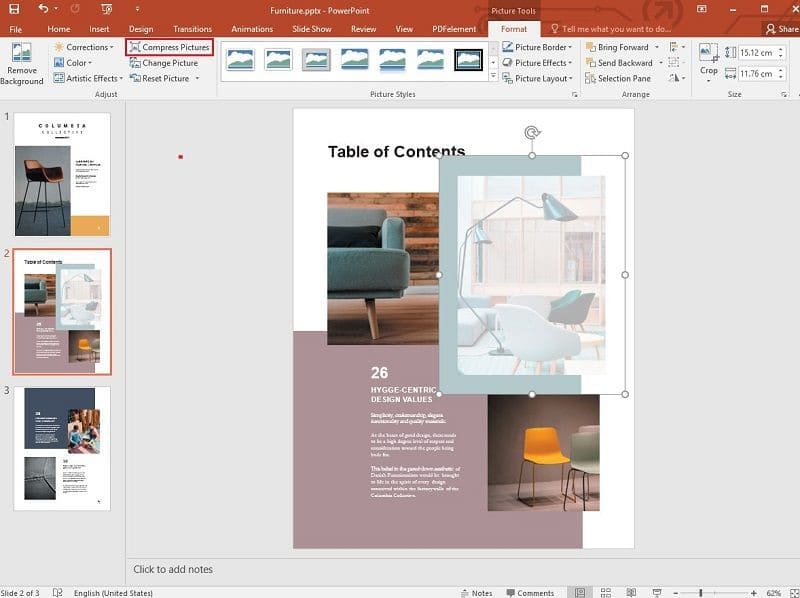
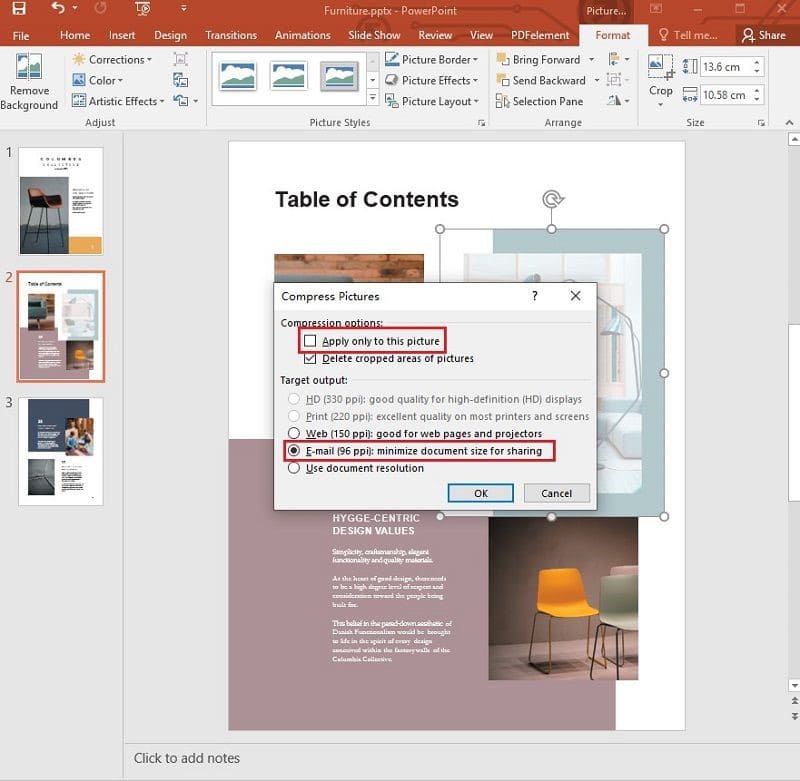
Step 2: Compress All Images
Select any image in your presentation and double-click to open the Picture Format tab. Click the Compress Pictures option in the Adjust group. In the compression dialog, ensure you uncheck "Apply only to this picture" to affect all images. Choose your preferred resolution - Email (96 ppi) for smallest size or Web (150 ppi) for balanced quality. For additional space savings, check "Delete cropped areas" before clicking OK.
Step 3: Verify and Save
Carefully review your slides to confirm image quality meets your needs. When saving, use File > Save As to create a new compressed version rather than overwriting your original file. This preserves your high-quality source material.
Pro Tips
Before Compressing:
- Always create a backup using Save As before compressing to preserve original quality
- Remove hidden cropped areas first via File → Info → Compress Media for maximum savings
After Compressing:
- Use PDF Agile to optimize exported PDFs while maintaining professional image quality
- PDF Agile's smart compression reduces file size without visible quality loss
- Set custom DPI in PDF Agile when converting critical image-heavy presentations
Quality Control:
- Zoom to 200% after compressing to verify critical images remain sharp
- Compare backup and compressed versions side-by-side before finalizing
Method 3: How to Reduce PowerPoint File Size with an Online Tool
Using free online tools, you can quickly reduce your PPT/PPTX file size while keeping your slides clear and professional.
Step 1: Convert PowerPoint to PDF
Begin by visiting a reliable online PDF converter such as Smallpdf or iLovePDF. Upload your PowerPoint file (PPT/PPTX format) and allow the tool to process the conversion to PDF format. This initial conversion often reduces file size significantly.
Step 2: Compress the PDF File
Using the same platform or a dedicated PDF compressor, select your preferred compression level. Most tools offer options like "Low" for minimal quality loss or "High" for maximum size reduction. After processing, download the compressed PDF to your device.
Step 3: Convert Back to PowerPoint Format
Visit a PDF-to-PPT converter like PDF Agile and upload your compressed PDF file. Select PowerPoint (PPT/PPTX) as your output format, then download the final optimized presentation. This process typically maintains most formatting while significantly reducing file size.
Pro Tips
✔ Use "Medium" compression – Balances quality and file size.
✔ Delete unnecessary slides first – Smaller files compress faster.
✔ Try multiple tools – Some compress better than others.
Final Words
Choosing the right slide size in PowerPoint isn't just about aesthetics—it's about compatibility, professionalism, and efficiency. Whether you use preset dimensions, compress oversized images, or optimize with online tools, these methods ensure your presentation looks sharp and loads fast.
- Design Tab (Quick Presets) – Best for standardizing slide dimensions.
- Image Compression – Reduces file size without losing quality.
- Online Tools – Perfect for quick, no-download optimization.
Now that you know how to adjust slide sizes and reduce file bloat, your next presentation will be visually flawless and easy to share!