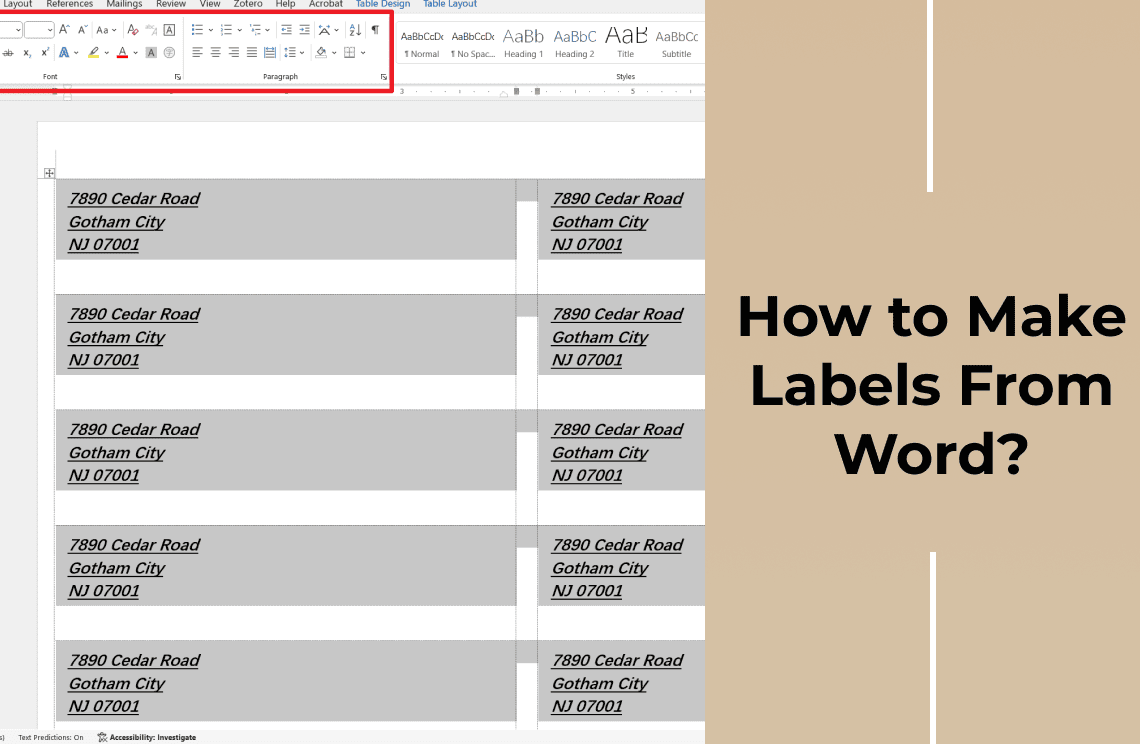
Welcome to our comprehensive guide on "How to Make Labels From Word"! In today's fast-paced world, effective labeling is crucial for organization, branding, and communication. Whether you're creating address labels, product tags, or custom stickers, Microsoft Word offers a powerful and user-friendly platform to design and print labels tailored to your needs. In this tutorial, we will walk you through the entire process of creating labels in Word, from setting up your document to printing and sharing your finished labels. You'll learn how to utilize Word's built-in templates, customize your designs with text and images, and ensure your labels are perfectly aligned and formatted.
Section I. Setting Up Your Document
Step 1.Creating a New Document
Open Microsoft Word: Launch Microsoft Word from your desktop or start menu.
Create a New Document:
- Click on "File" in the top-left corner.
- Select "New" from the menu.
- Choose "Blank Document" to start with a clean slate.
Step 2.Choosing the Right Template
Built-in Label Templates:
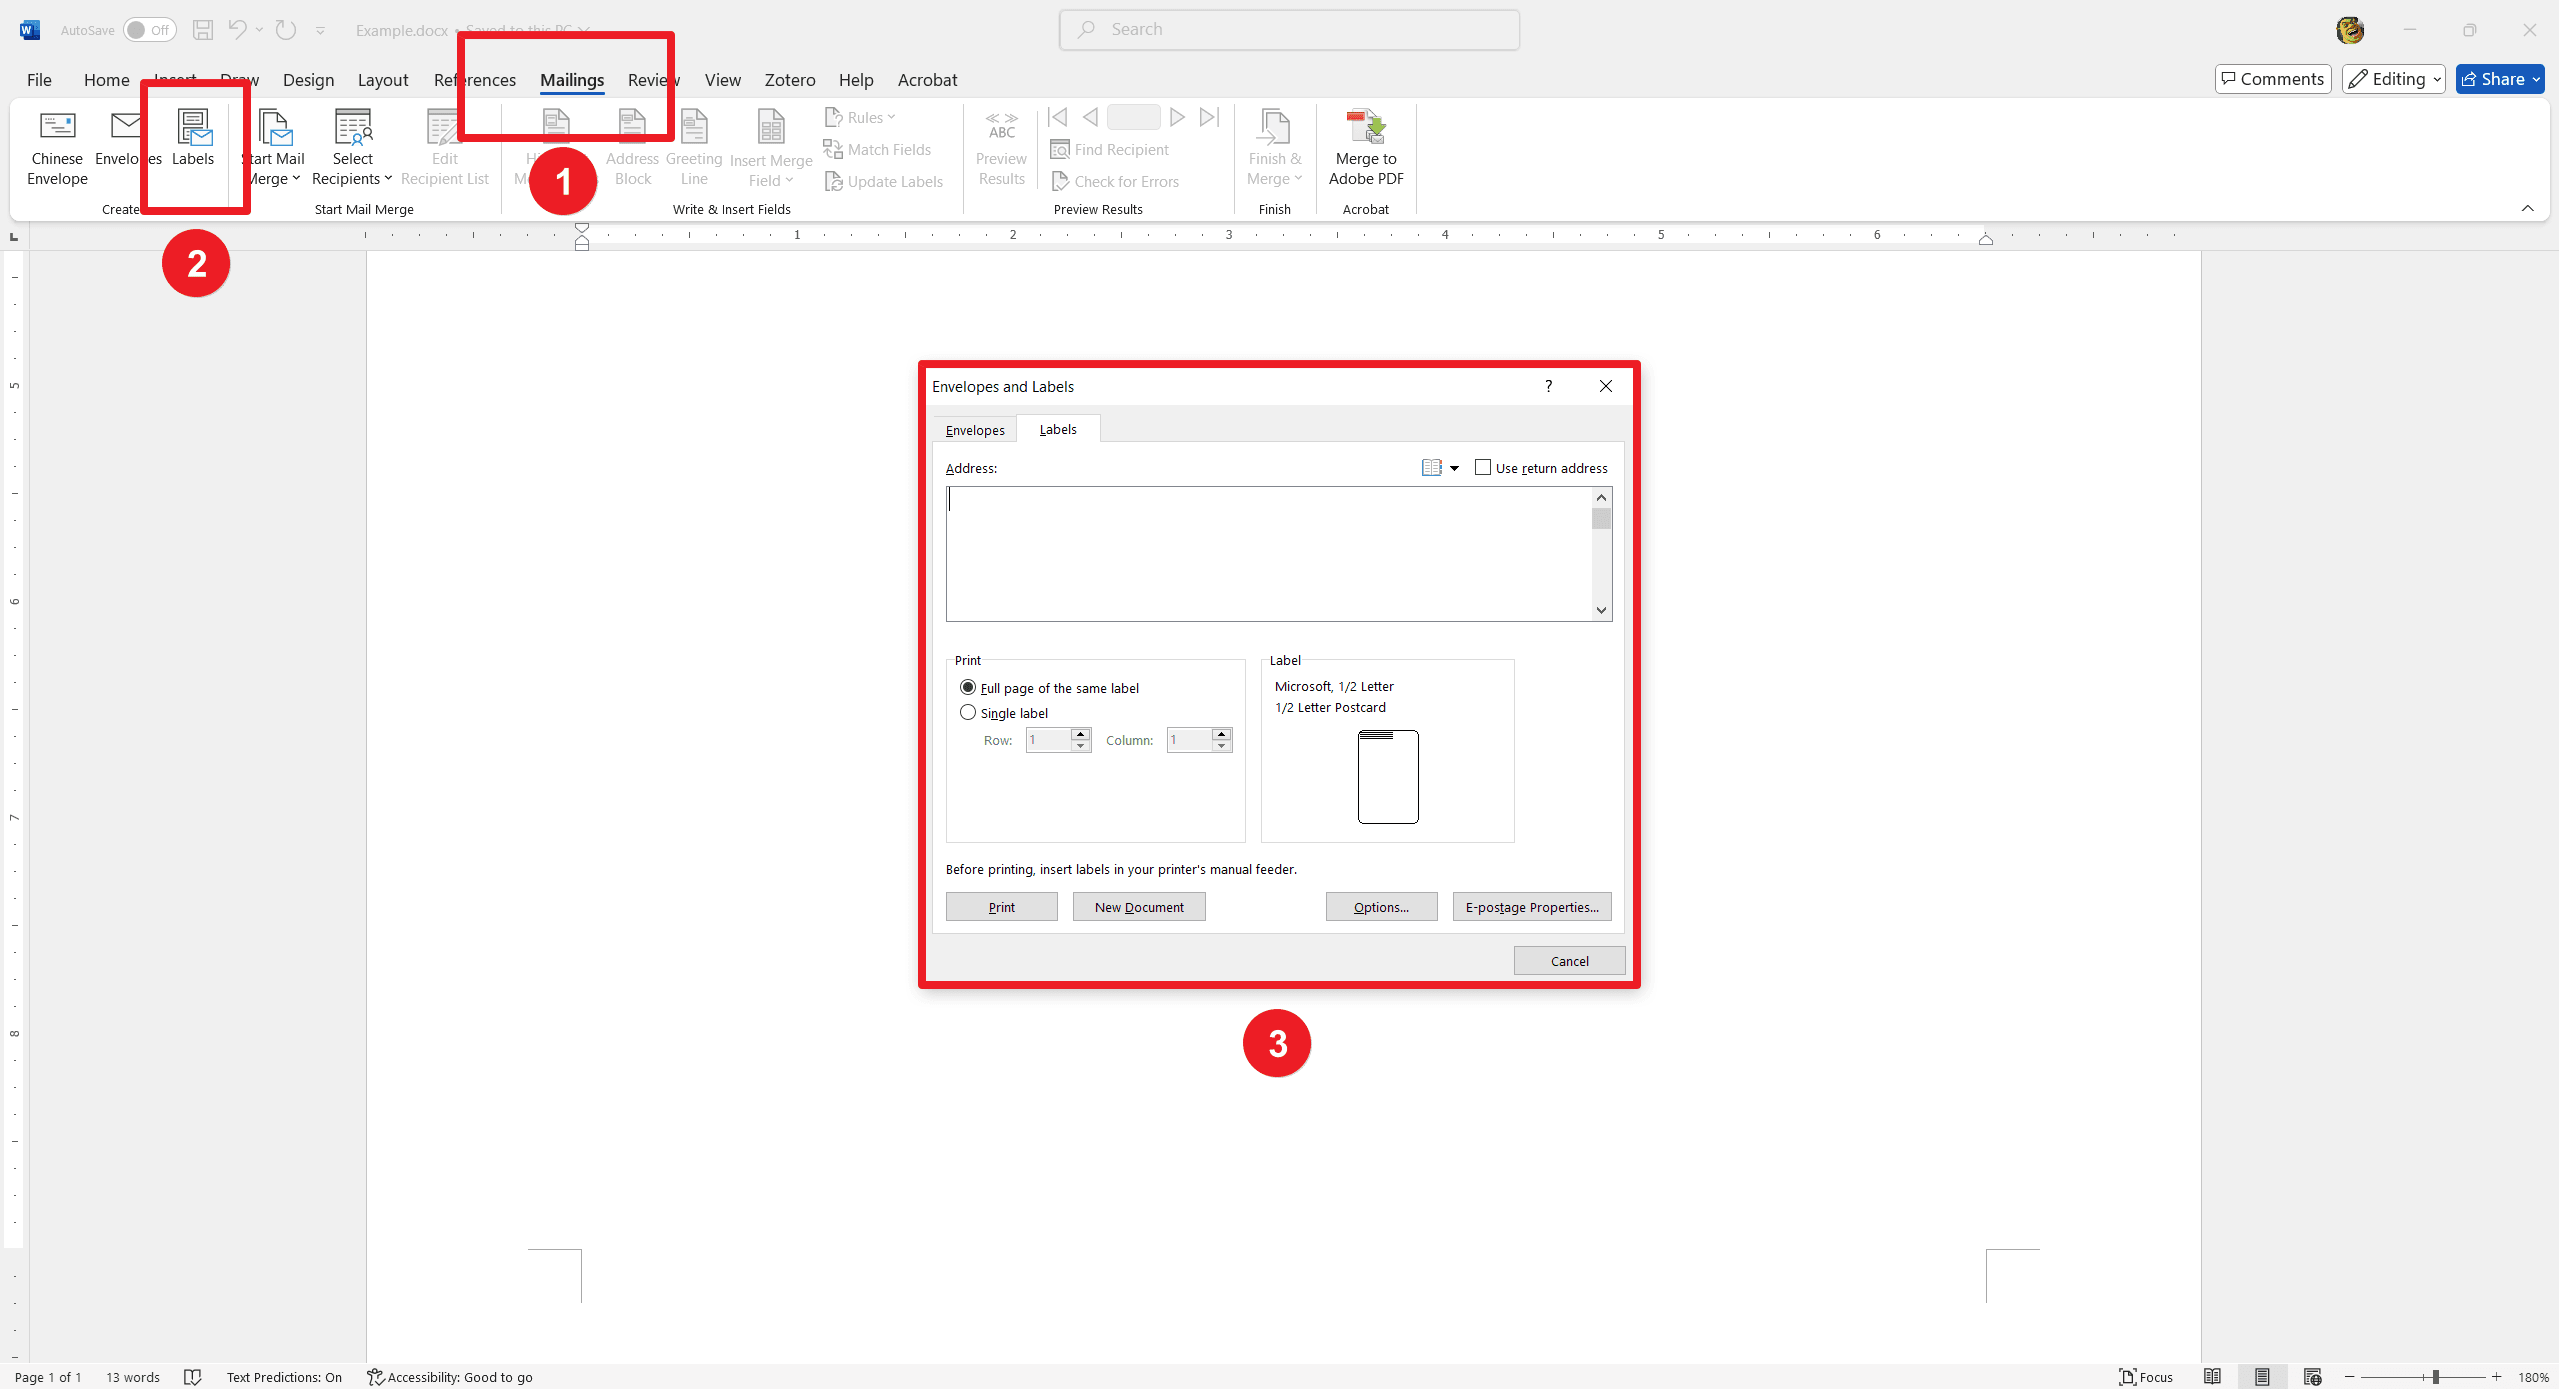
- Go to the "Mailings" tab on the Ribbon.
- Click on "Labels" in the Create group.
- In the Envelopes and Labels dialog box, click on the "Labels" tab.
- Select the label vendor and product number that matches your label sheets (e.g., Avery, DYMO).
- Click "New Document" to insert the label template into your document.
Custom Label Templates:
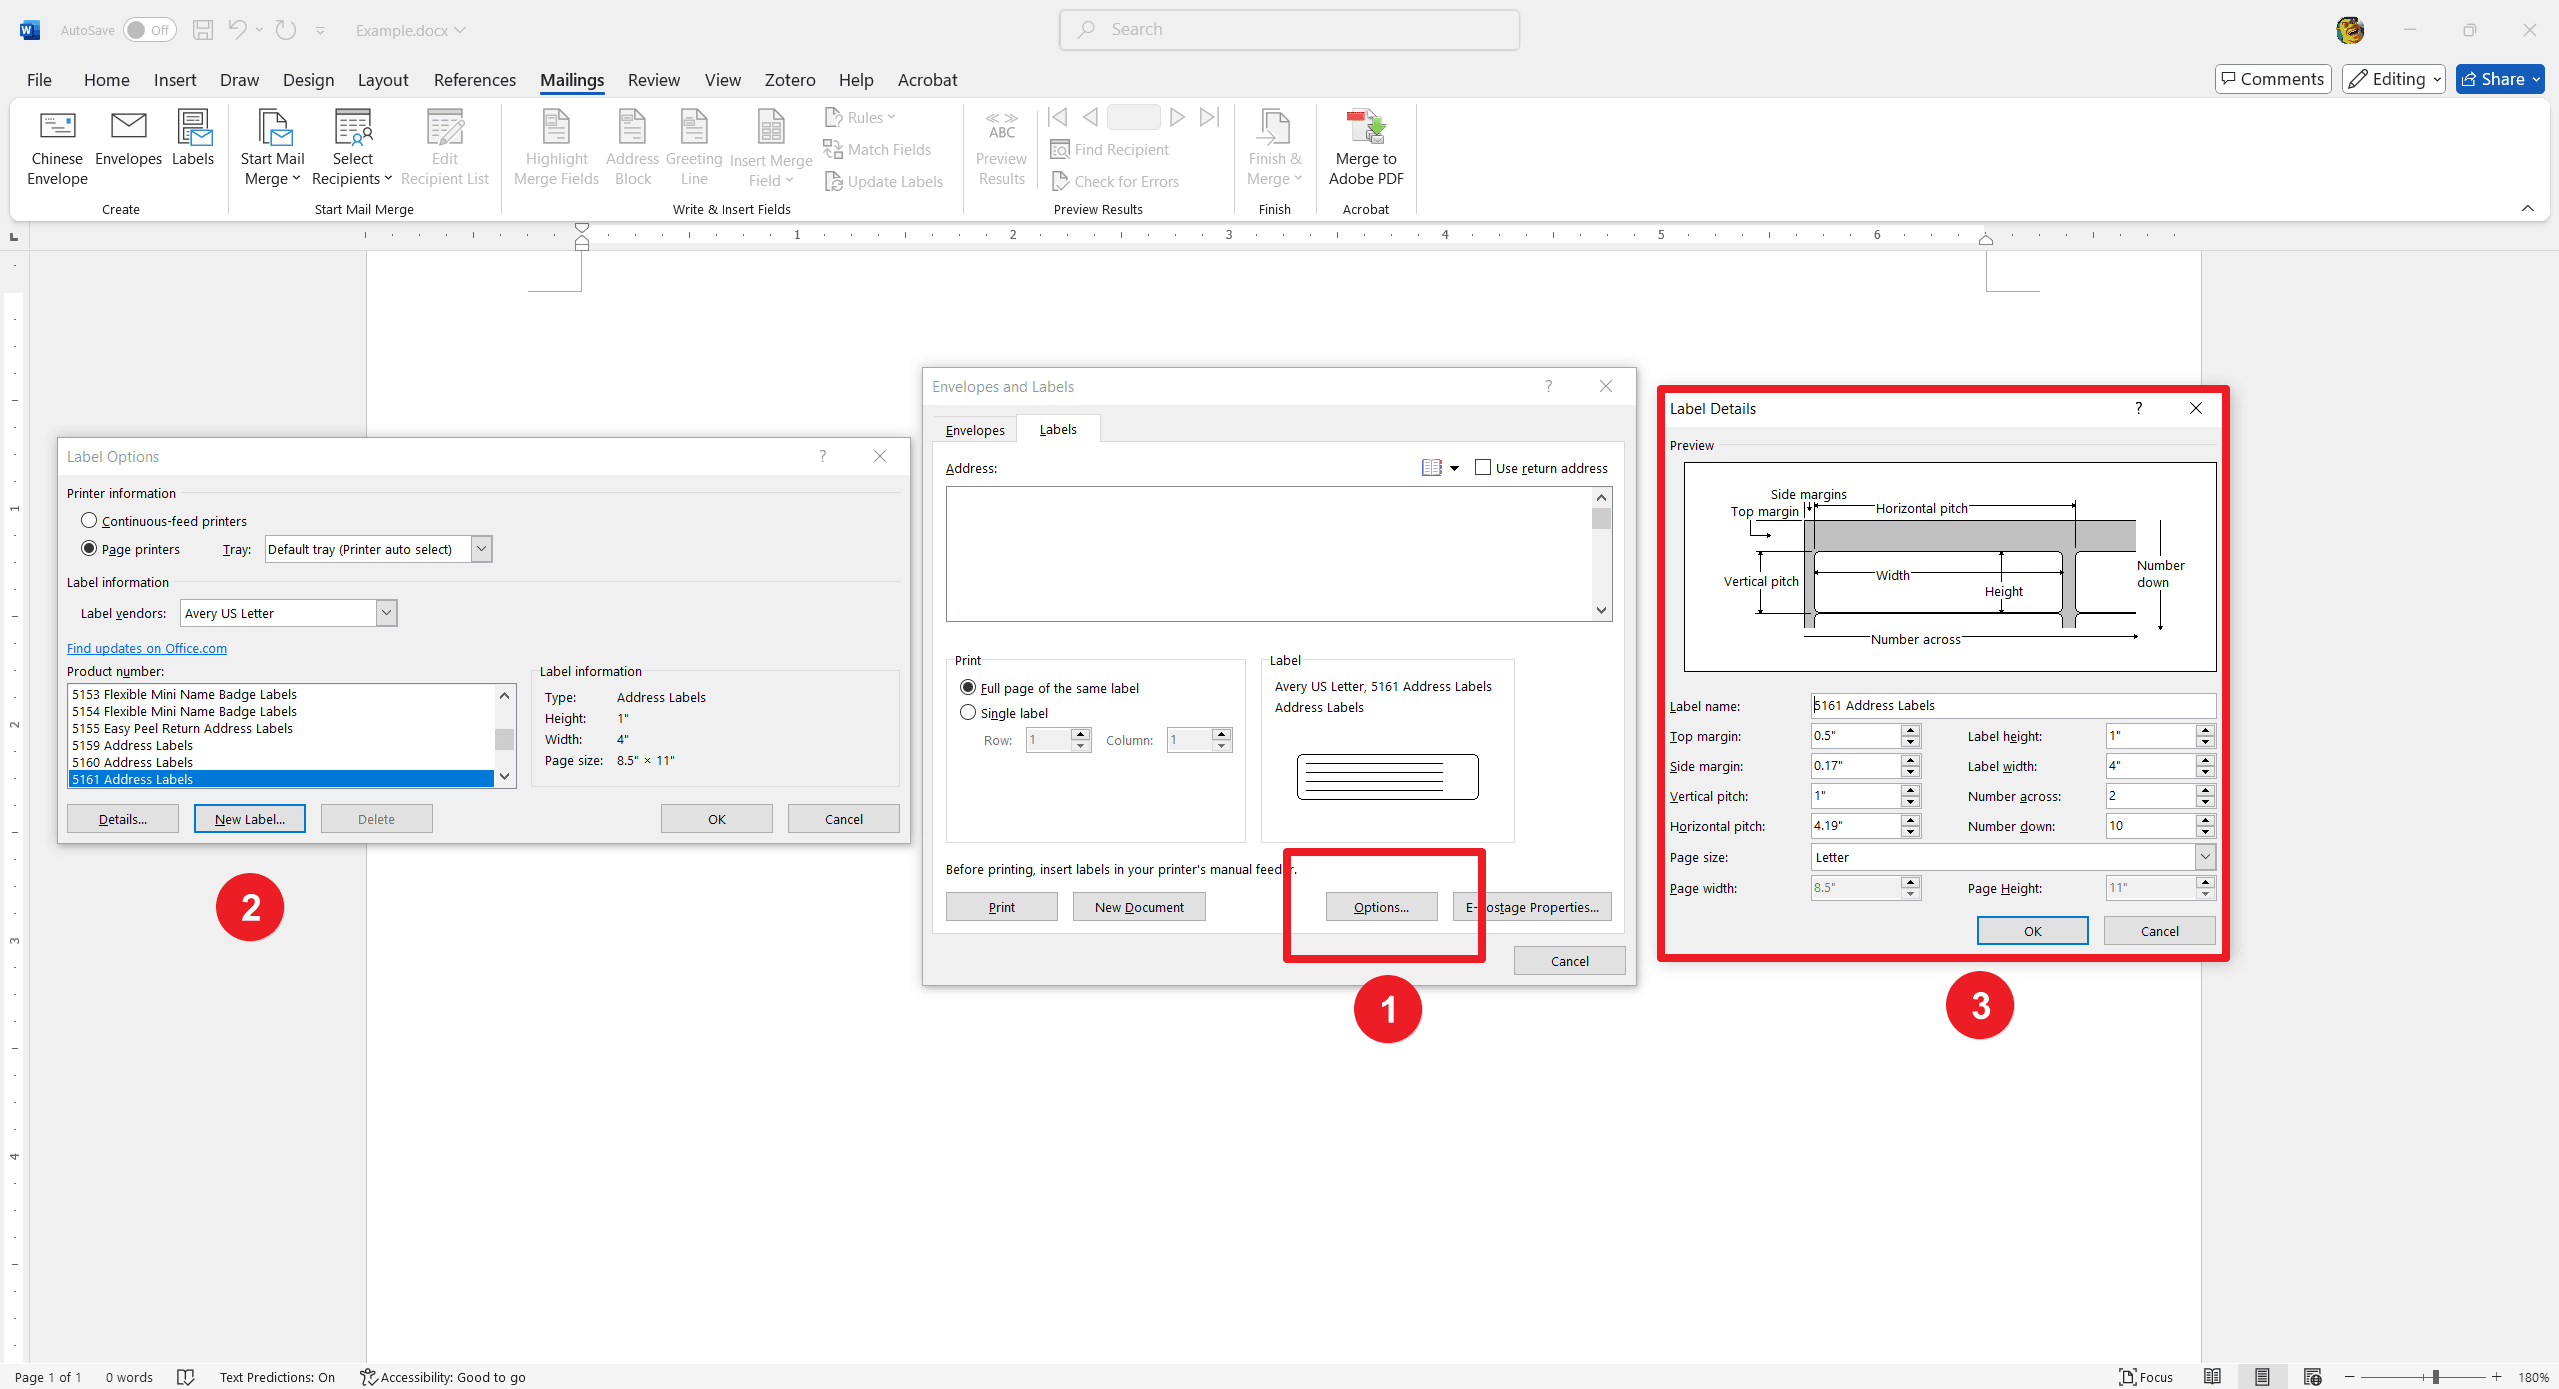
- If you need a custom size, go to the "Mailings" tab.
- Click on "Labels" and then "Options" in the Envelopes and Labels dialog box.
- Select "New Label" and enter the dimensions and margins for your custom labels.
Step 3. Selecting Label Size and Type
Label Size:
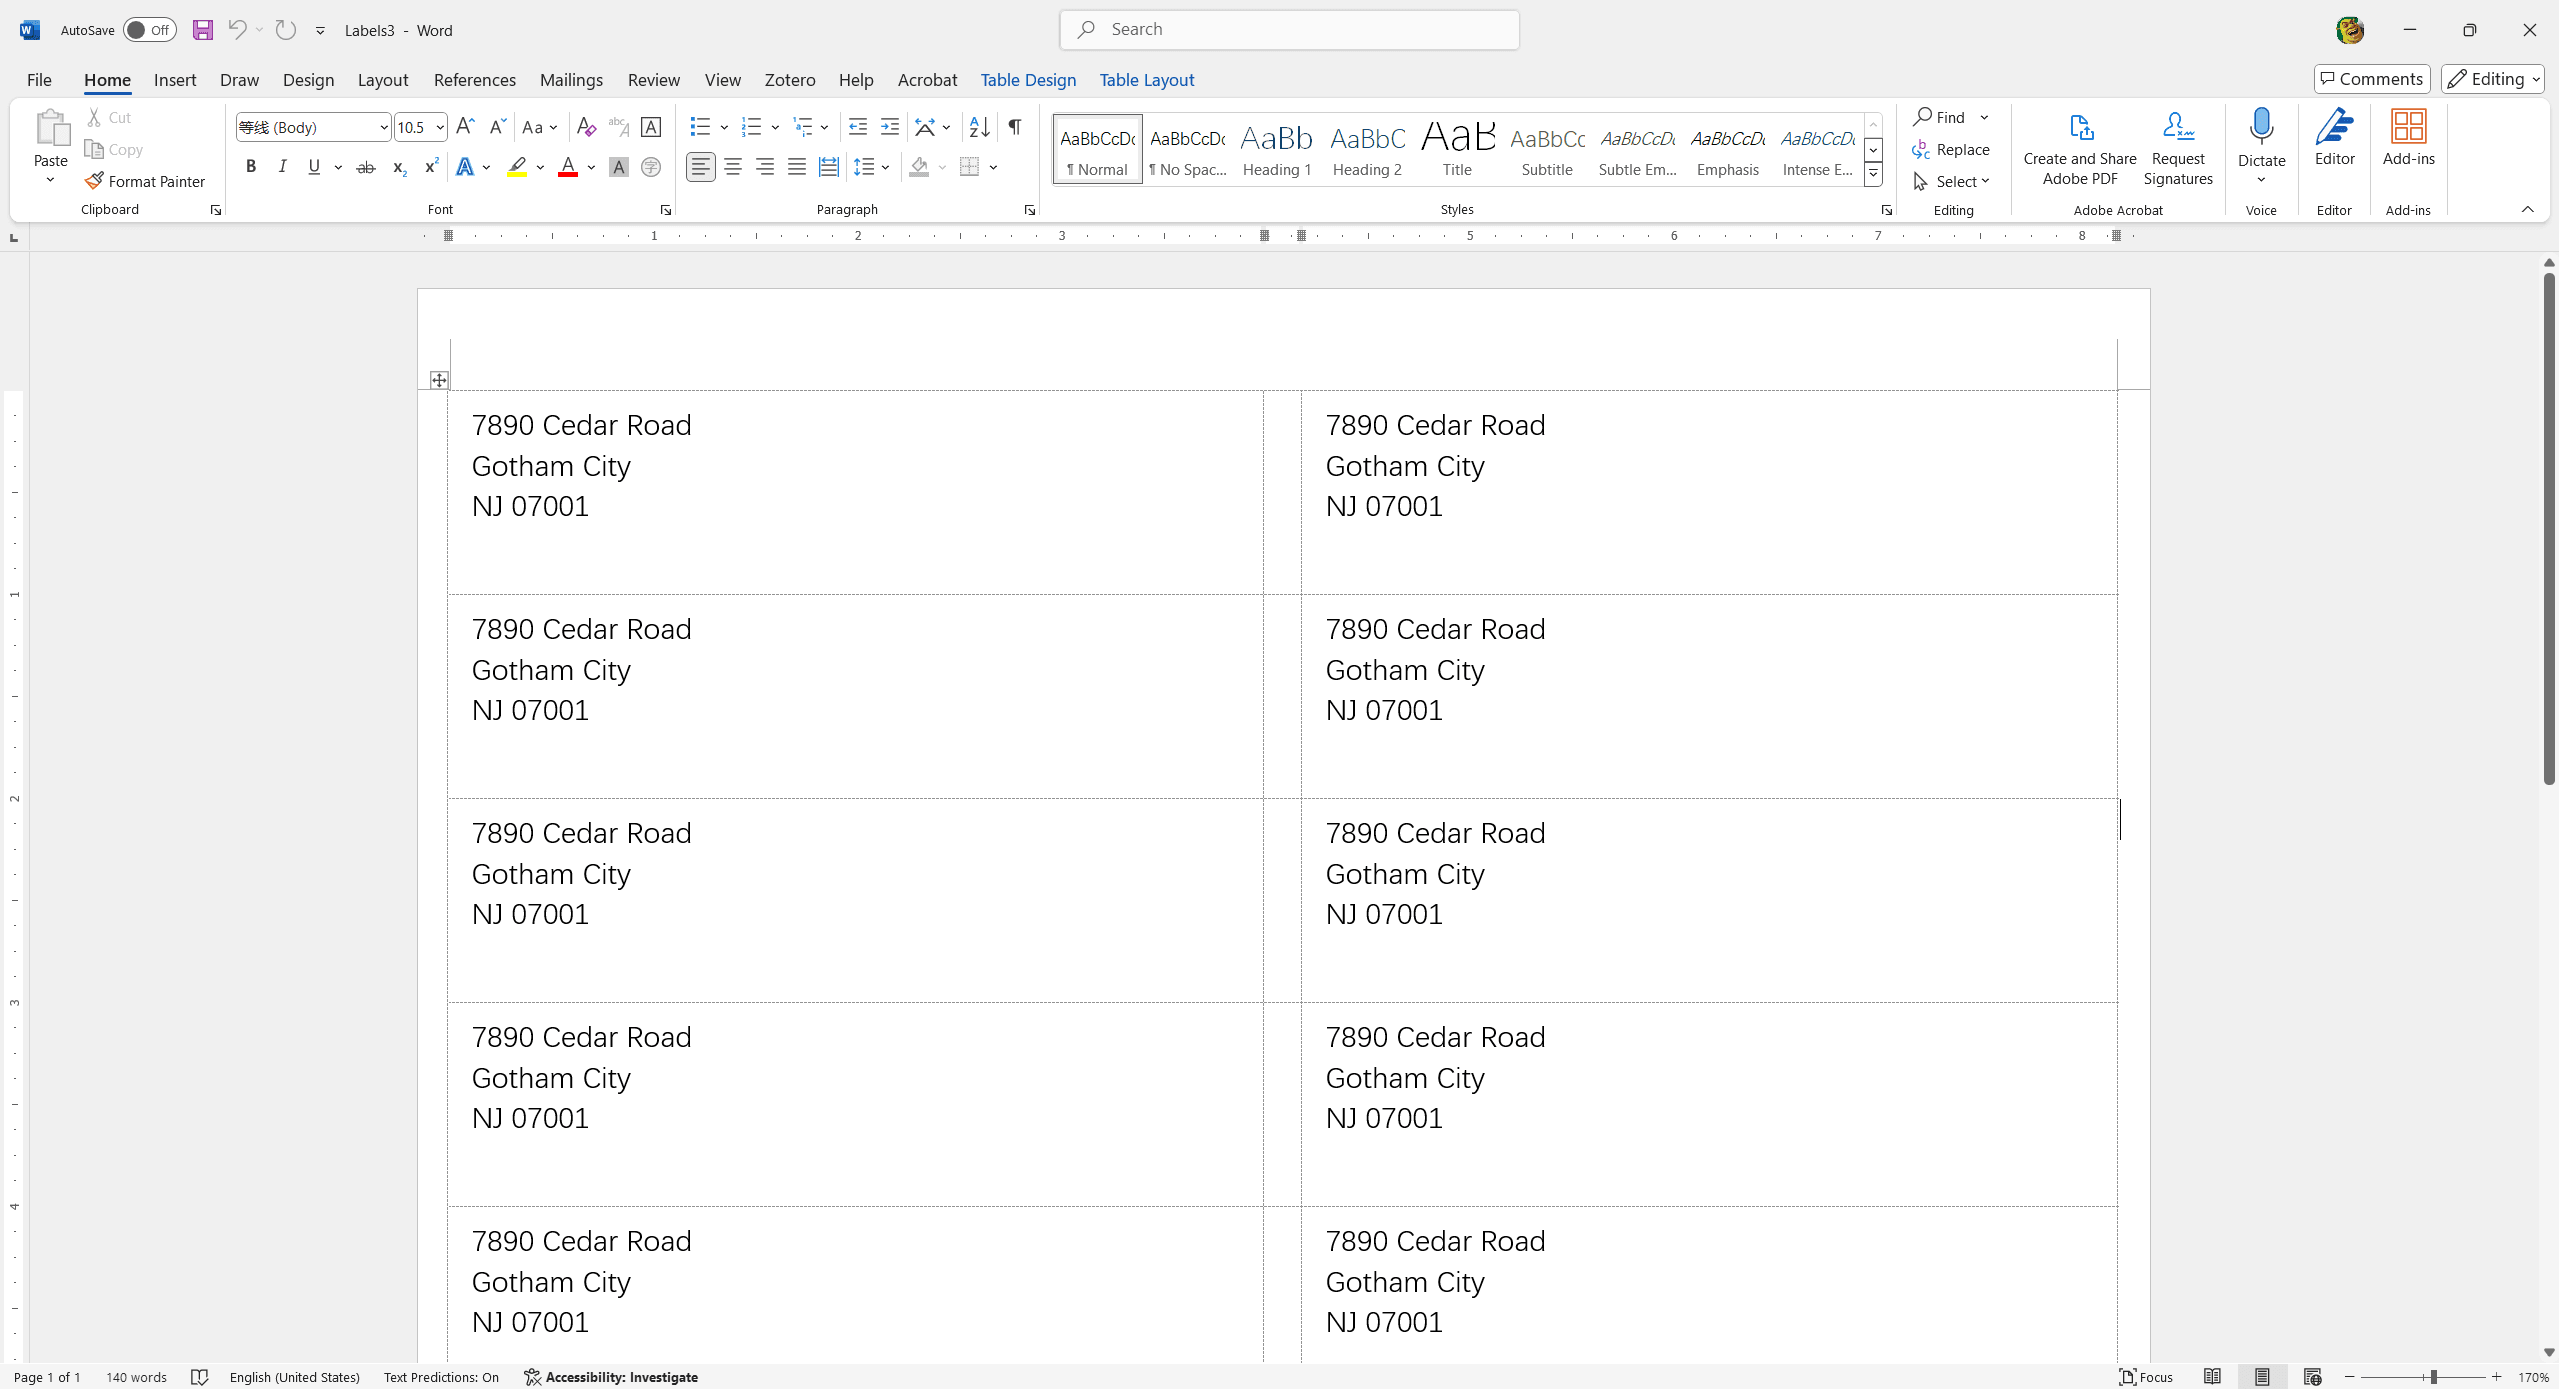
- Ensure you have the correct label size selected in the Envelopes and Labels dialog box.
- Common sizes include address labels, shipping labels, and name badges.
- Verify the dimensions match the label sheets you will be printing on.
Label Type:
- Choose the type of label based on your needs (e.g., address labels, shipping labels, name tags).
- Consider the purpose of the labels to select the appropriate type (e.g., mailing, packaging, identification).
Step 4.Preparing the Document for Design
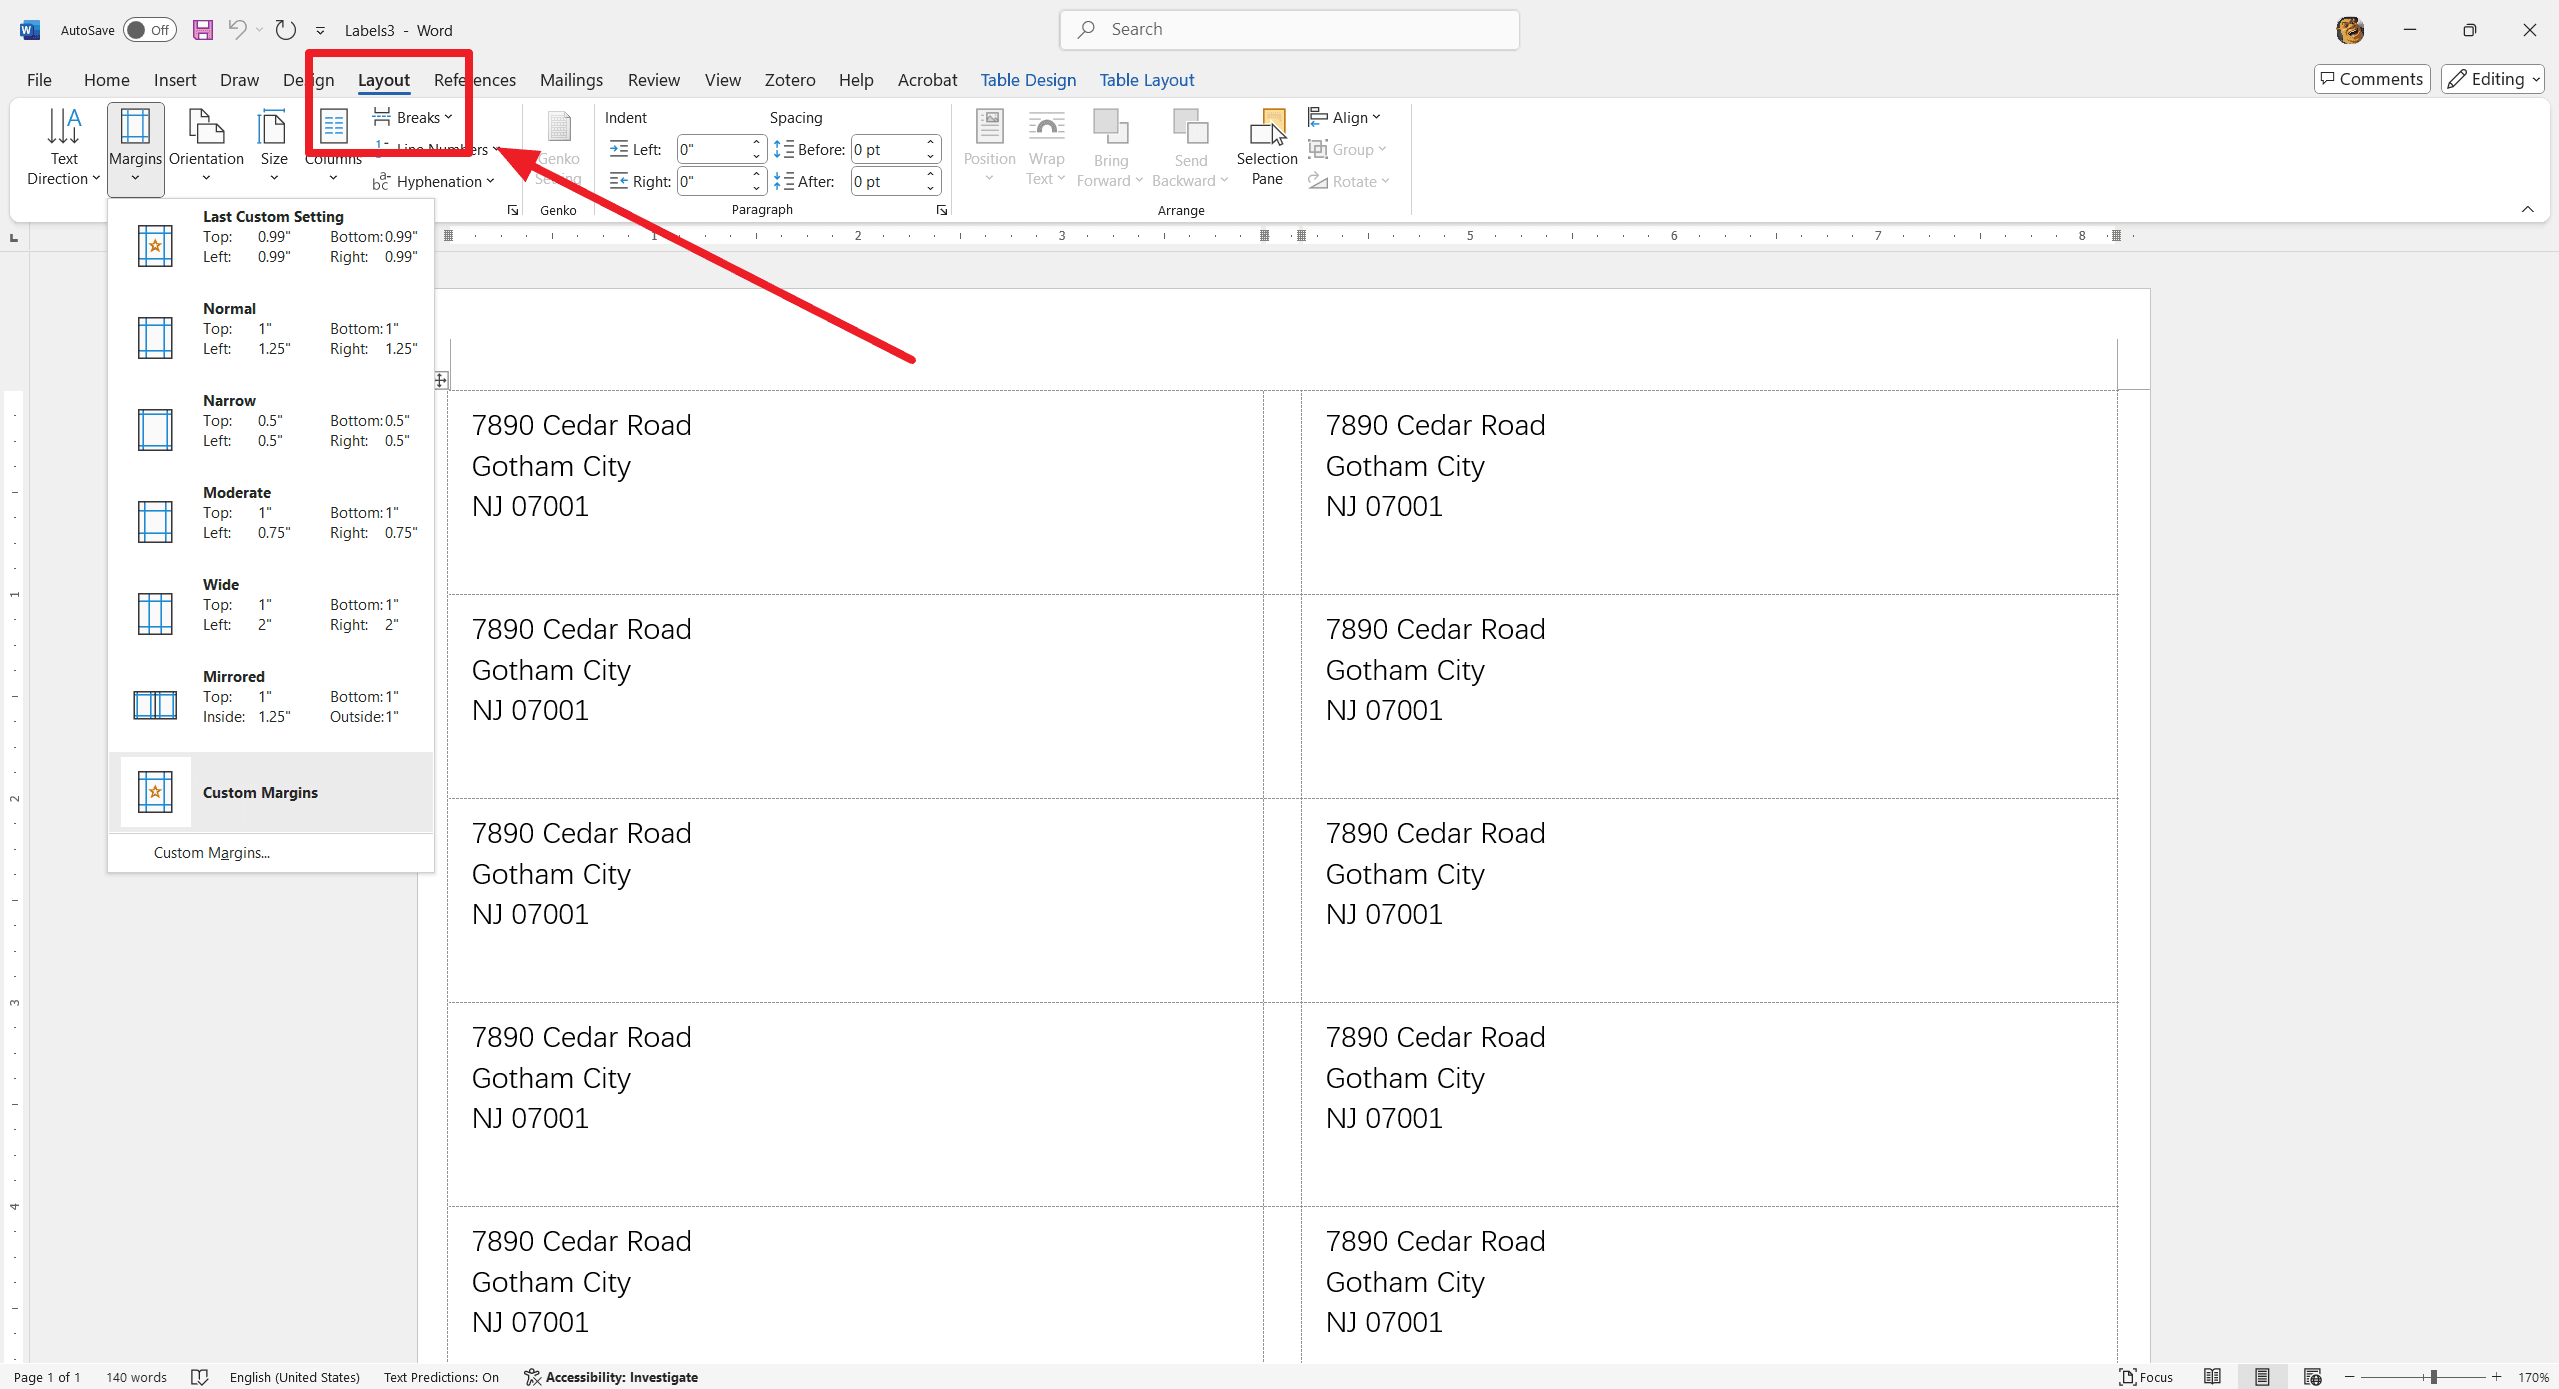
Adjust Page Layout:
- Go to the "Layout" tab on the Ribbon.
- Set the page size to match your label sheet size.
- Adjust margins if necessary to ensure proper alignment.
Set Up Label Grid:
- If using a table for complex layouts, insert a table with the correct number of rows and columns to match your label sheet.
- Go to the "Insert" tab, click on "Table," and select the number of rows and columns.
- Adjust table cell sizes to fit the label dimensions.
Section II. Designing Your Labels
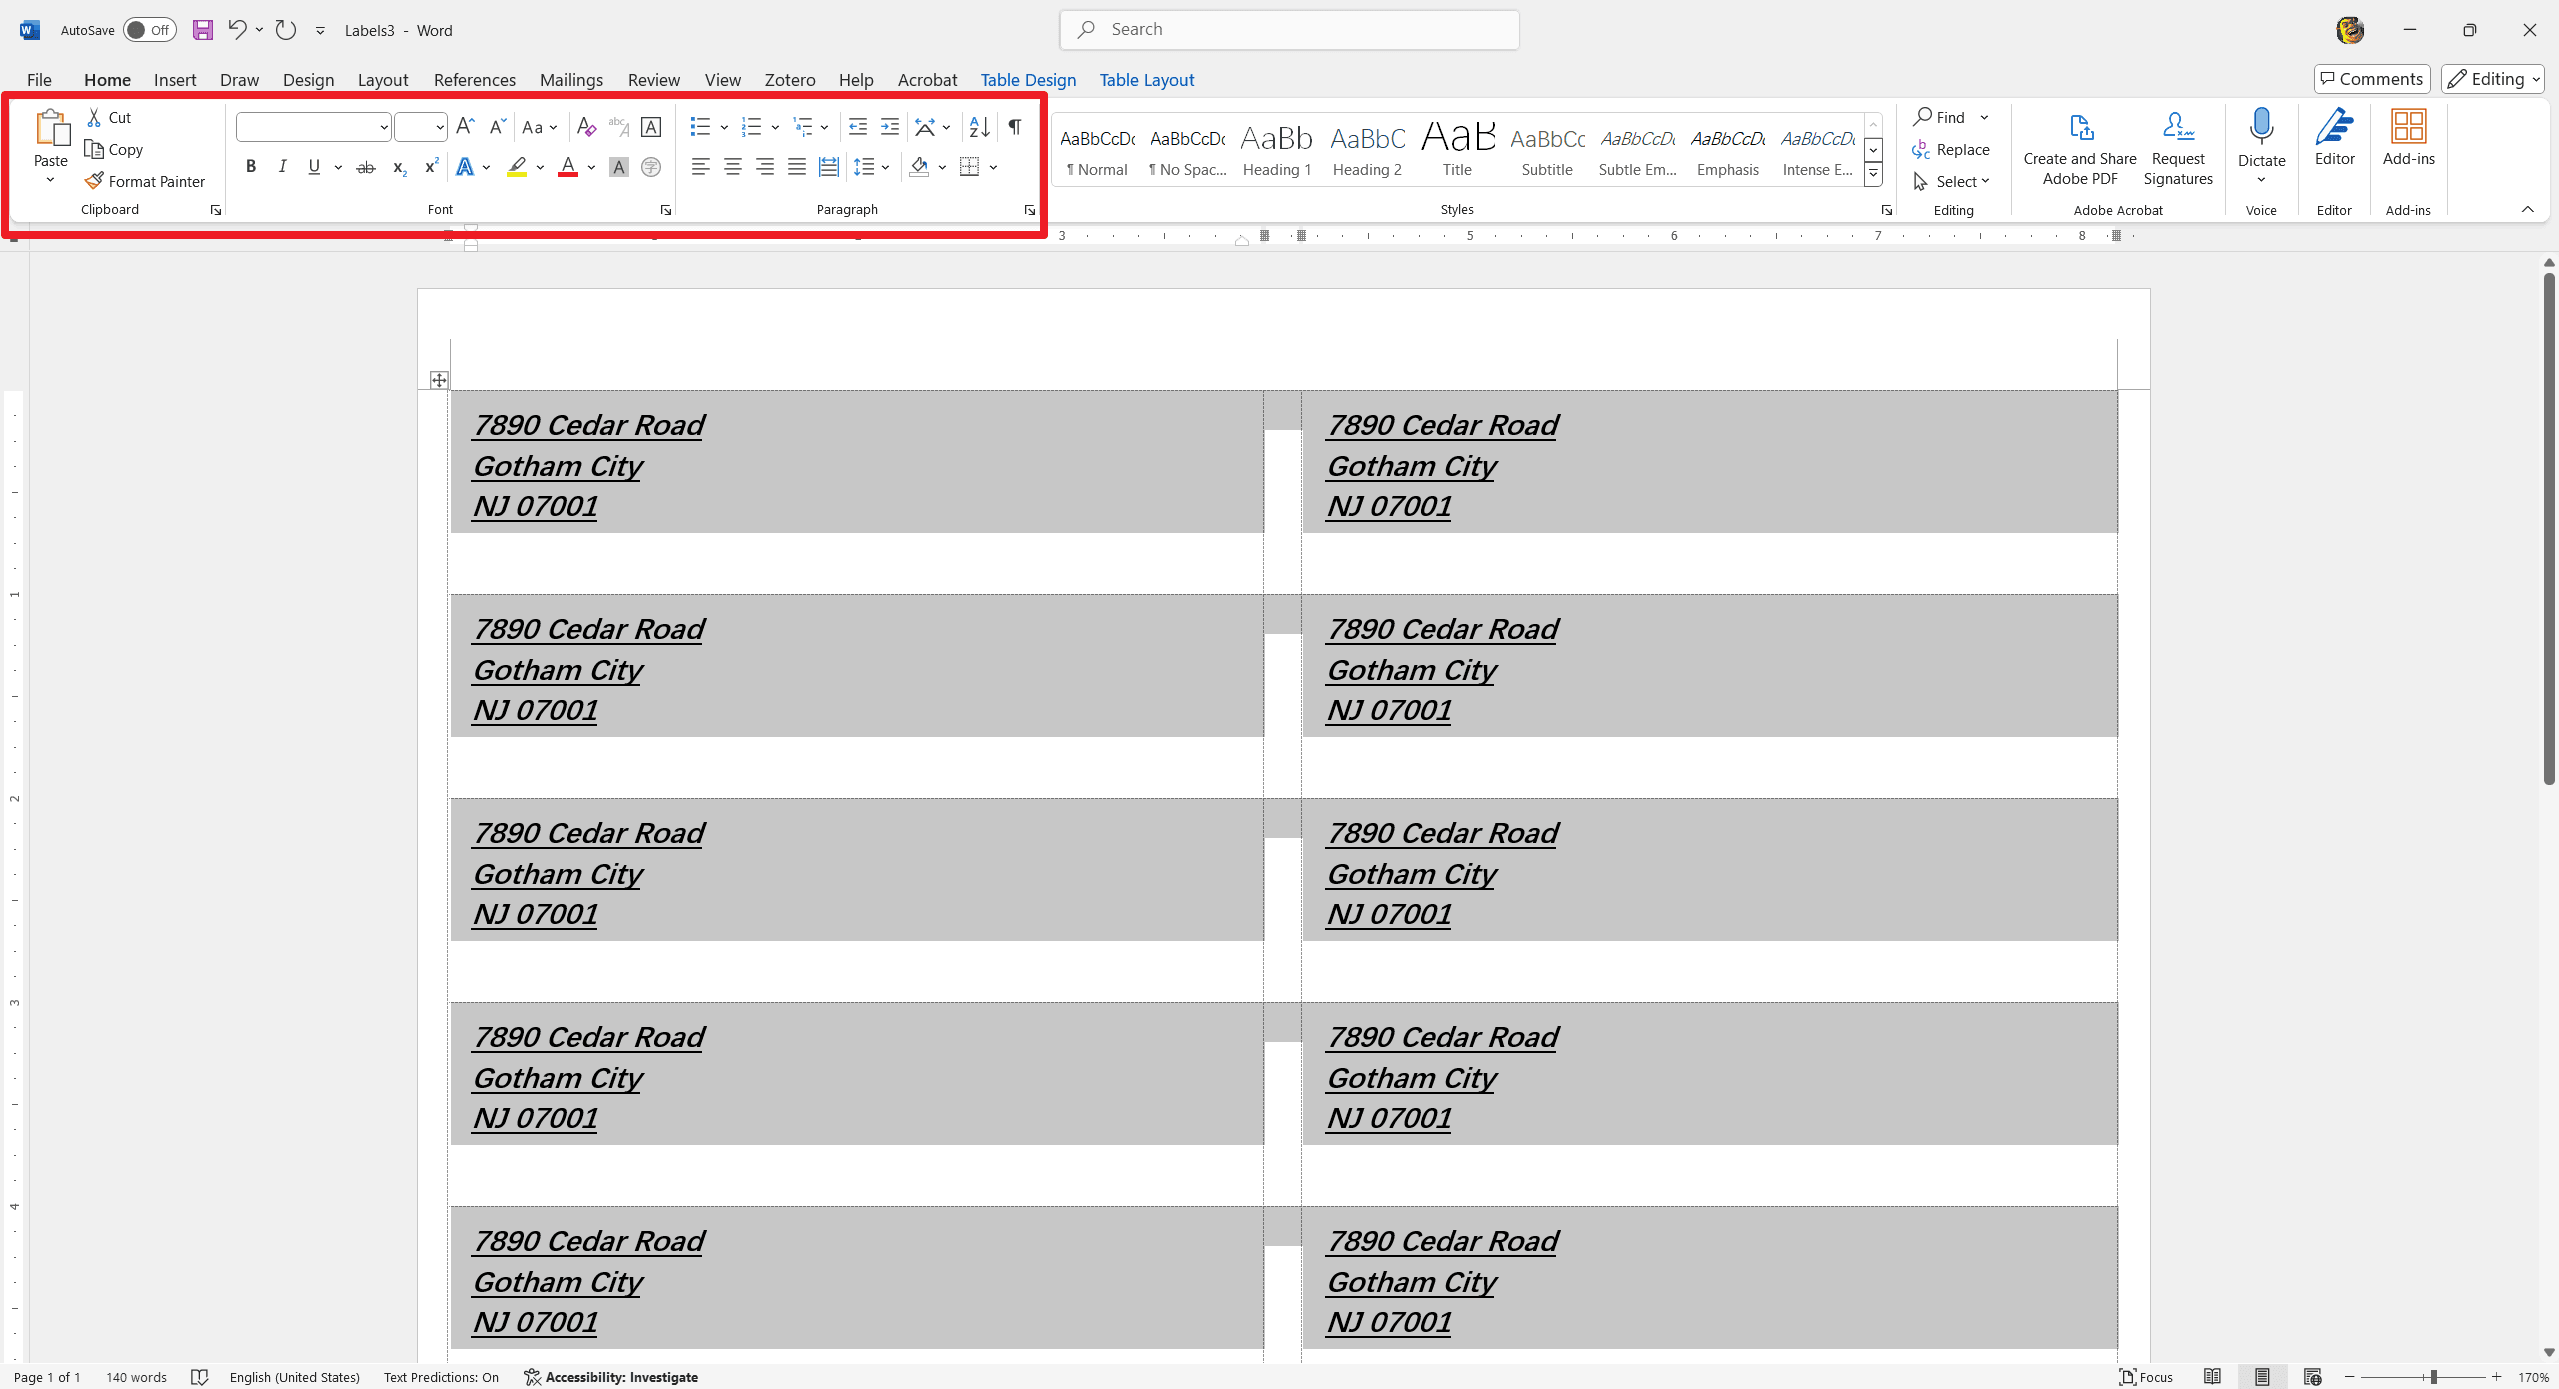
Step 1. Inserting Text
Adding Text Boxes
- Step 1: Go to the "Insert" tab on the Ribbon.
- Step 2: Click on "Text Box" and select "Draw Text Box."
- Step 3: Click and drag to create a text box on your label.
Formatting Text
- Font Selection: Choose a clear and readable font from the "Home" tab.
- Font Size: Adjust the font size to ensure it fits well within the label dimensions.
- Font Color: Select a color that contrasts well with the background for better readability.
- Bold, Italic, Underline: Use these options sparingly to emphasize important information.
Step 2. Adding Images or Logos
Inserting Images
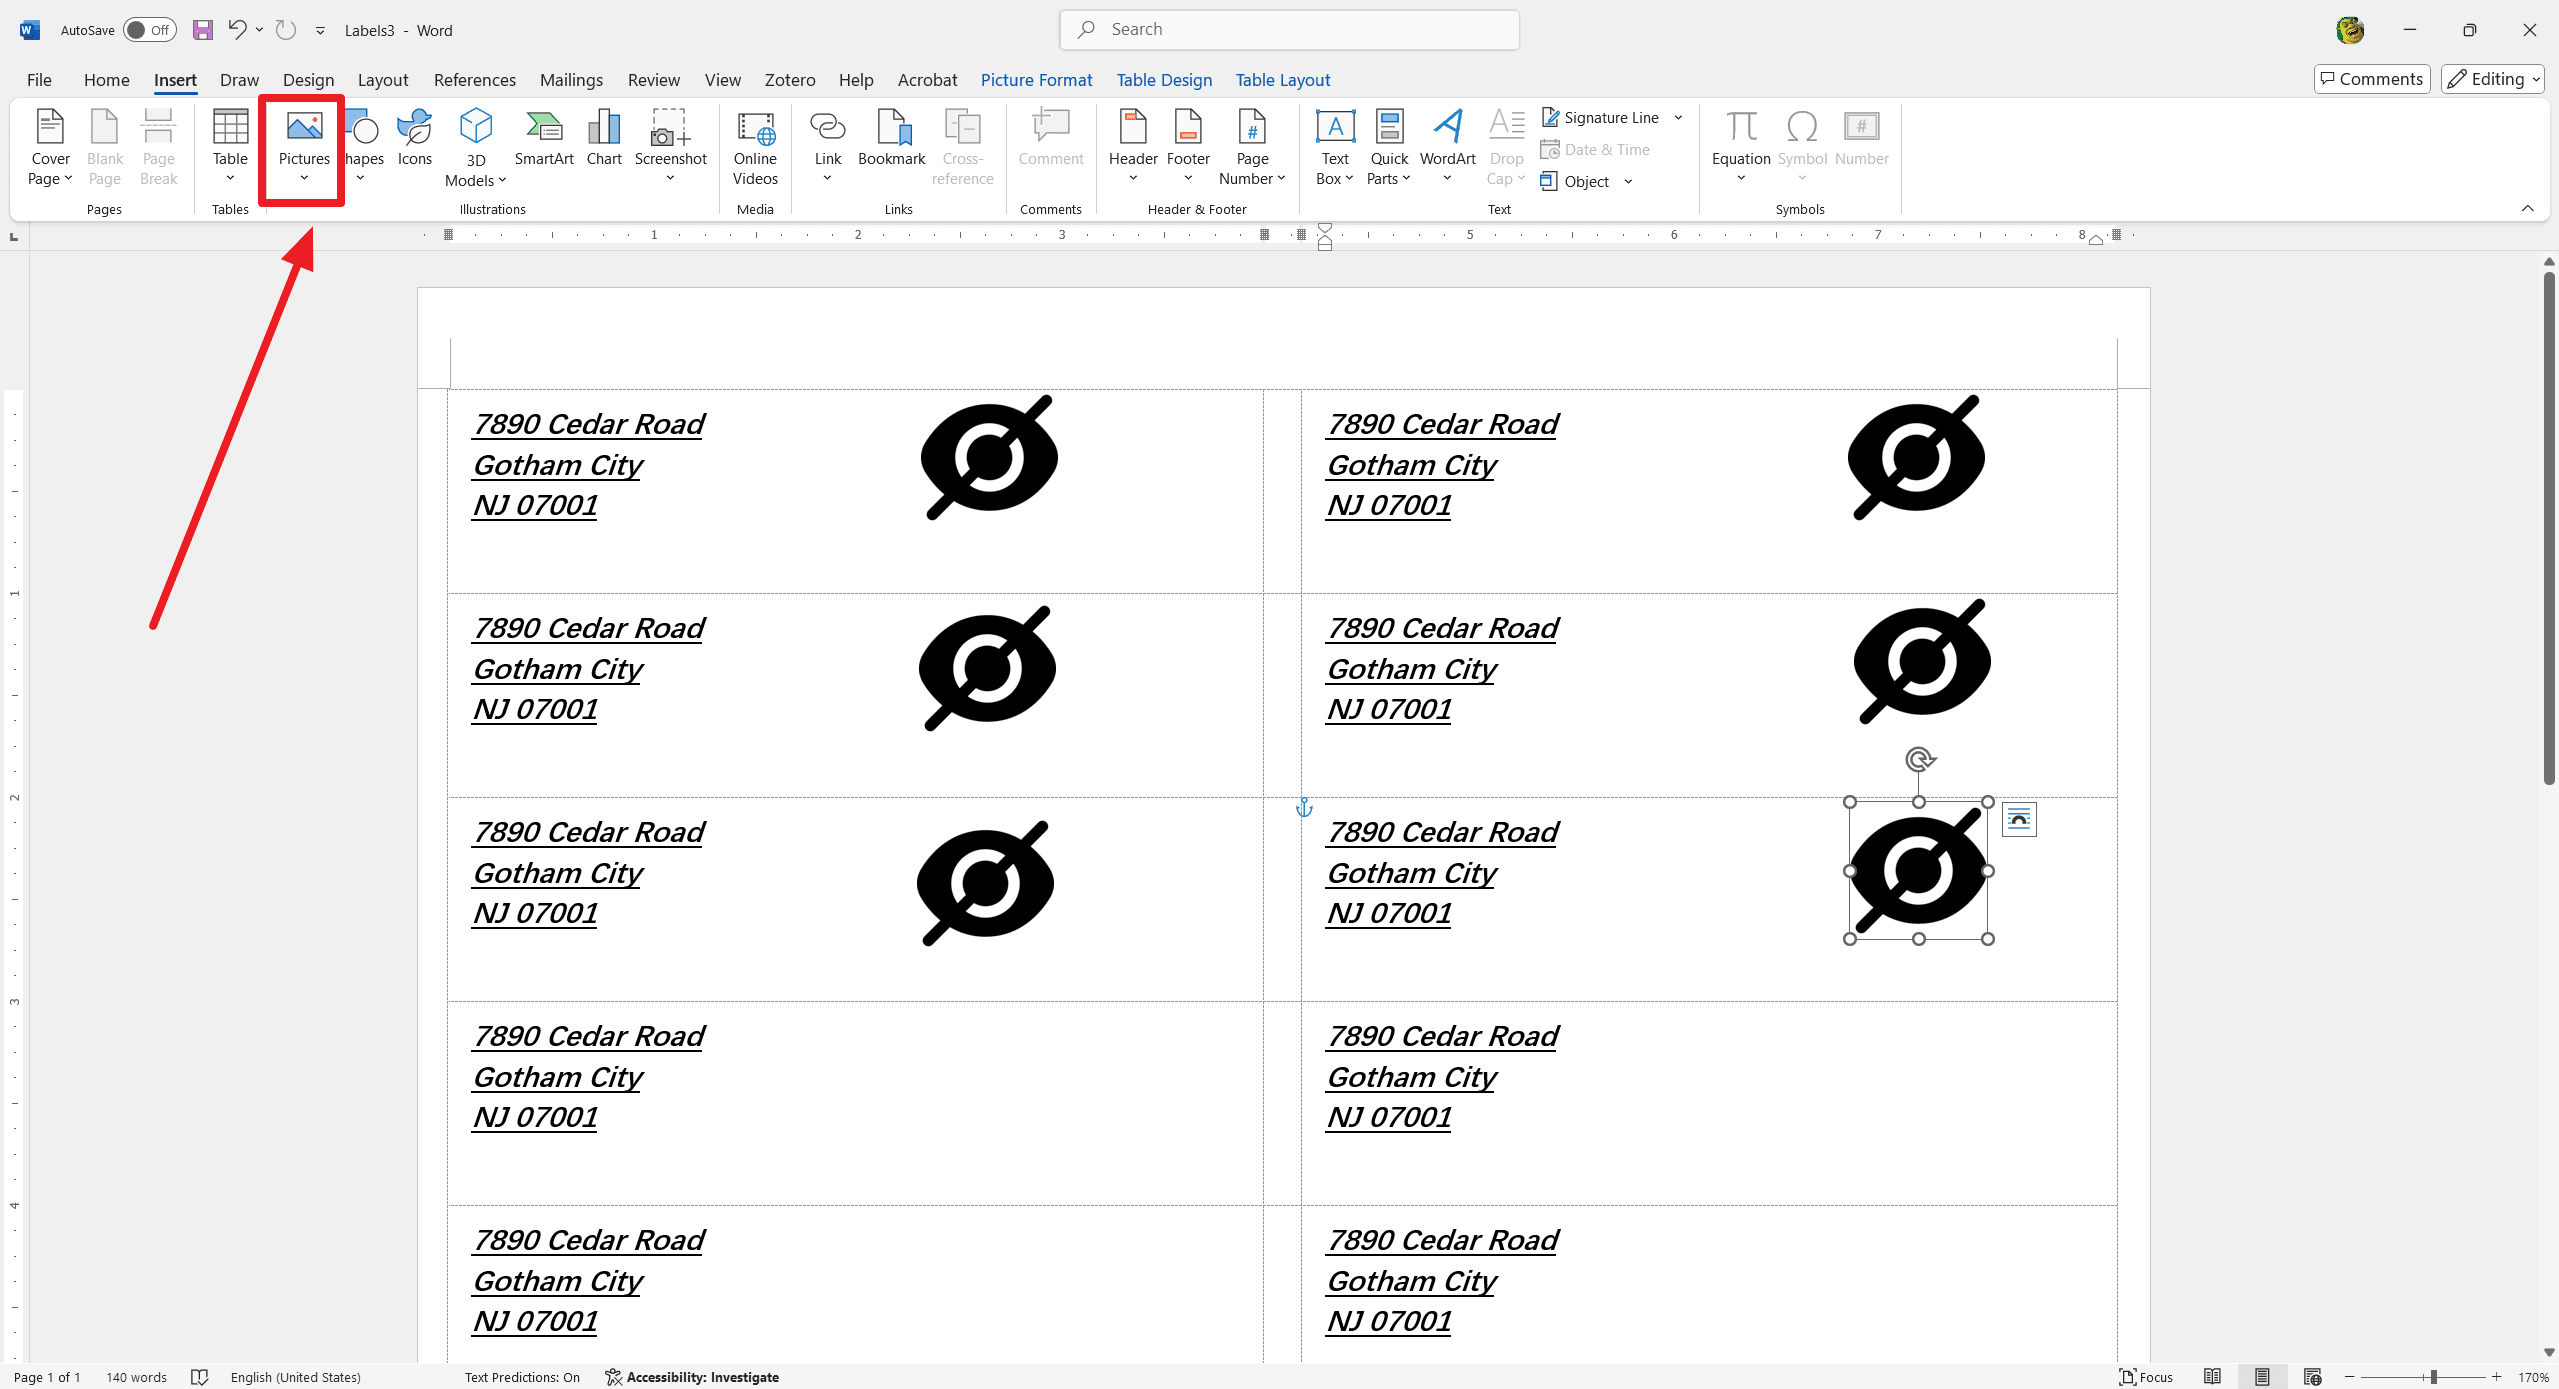
- Step 1: Go to the "Insert" tab.
- Step 2: Click on "Pictures" or "Online Pictures" to insert an image from your computer or the web.
- Step 3: Select the image and click "Insert."
Resizing and Positioning Images
- Resizing: Click on the image to select it, then drag the corners to resize while maintaining the aspect ratio.
- Positioning: Use the alignment tools in the "Format" tab to position the image accurately within the label.
- Wrapping Text: Choose "In Front of Text" or "Behind Text" from the "Wrap Text" options to control how text interacts with the image.
Step 3. Using Shapes and Icons
Inserting Shapes
- Step 1: Go to the "Insert" tab.
- Step 2: Click on "Shapes" and select the desired shape (e.g., rectangle, circle, arrow).
- Step 3: Click and drag to draw the shape on your label.
Formatting Shapes
- Fill Color: Choose a fill color that complements your label design.
- Outline Color: Select an outline color that matches or contrasts with the fill color.
- Effects: Apply shadows, glows, or reflections from the "Format" tab to add depth and dimension.
Section III. Printing Your Labels
Printing your labels is the final step in creating professional and polished labels. Follow these steps to ensure a smooth printing process:
Step 1. Previewing Your Labels
- Preview Mode: Before printing, it's crucial to preview your labels to ensure everything looks as expected.
- Go to the File tab and select Print.
- Use the preview pane to check the layout, alignment, and overall appearance of your labels.
- Zoom In: Use the zoom feature to closely inspect each label for any formatting issues or errors.
Step 2. Setting Up Printer Settings
- Select Your Printer: Ensure you have selected the correct printer from the list of available printers.
- Go to the File tab, select Print, and choose your printer from the dropdown menu.
- Paper Size and Type: Verify that the paper size and type match the labels you are using.
- Adjust the paper size in the printer settings to match your label sheets (e.g., A4, Letter, etc.).
- Select the correct paper type if your printer has specific settings for label paper.
- Print Quality: Choose the appropriate print quality setting.
- For high-quality labels, select the highest print quality option available.
- For drafts or test prints, you can use a lower quality setting to save ink.
Step 3. Printing Tips and Tricks
1. Test Print: Before printing the entire sheet, do a test print on plain paper.
- This helps you check the alignment and ensure that the labels will print correctly on the label sheets.
- Make any necessary adjustments based on the test print.
2. Alignment: Ensure that your labels are properly aligned on the sheet.
- Use the alignment marks on the label sheet as a guide.
- Adjust the margins and spacing in Word if necessary to achieve perfect alignment.
3. Printing Multiple Copies: If you need multiple copies of the same label, use the copy settings.
- In the print dialog, specify the number of copies you need.
- Ensure that the collate option is selected if you want each copy to be printed separately.
4. Saving Ink: To save ink, especially for large print jobs, consider using the draft mode for initial prints.
- Switch to high-quality mode for the final print.
5. Troubleshooting: If you encounter any issues during printing, such as misalignment or smudging, refer to the troubleshooting section for common solutions.
FAQs
Q1: What types of labels can I create in Microsoft Word?
A1: You can create a variety of labels in Microsoft Word, including address labels, shipping labels, name tags, and even custom labels for products or events. Word offers built-in templates for common label sizes, or you can create custom templates to fit your specific needs.
Q2: How do I ensure my labels print correctly?
A2: To ensure your labels print correctly, follow these steps:
- Use the correct label template that matches your label sheet.
- Preview your labels before printing to check for alignment and formatting.
- Make sure your printer settings are configured correctly, including paper size and orientation.
- Perform a test print on plain paper first to verify alignment before printing on label sheets.
Q3: Can I add images or logos to my labels?
A3: Yes, you can add images or logos to your labels. To do this, insert the image into your label template and adjust the size and position as needed. You can also add shapes, icons, and other graphic elements to enhance the design of your labels.
Q4: How do I align text and objects within my labels?
A4: To align text and objects within your labels, use the alignment tools available in Word. You can center, left-align, or right-align text and objects. Additionally, you can use tables to create a more structured layout, ensuring that all elements are properly aligned.

