Have you ever created a document you wanted to share while still maintaining confidentiality, or perhaps adding a subtle touch of branding? Watermarks are a fantastic way to achieve this in Microsoft Word. They are semi-transparent text or images that appear behind the main content of your document, adding a visual layer that doesn't interfere with readability.
This guide will walk you through the different ways to add watermarks in Word, from using pre-designed options to creating your own custom text or picture watermarks.
Benefits of Using Watermarks
There are several advantages to using watermarks in your Word documents:
- Confidentiality: Adding a "DRAFT," "CONFIDENTIAL," or "DO NOT COPY" watermark can deter unauthorized copying or distribution.
- Branding: A subtle company logo or tagline watermark can add a professional touch and increase brand recognition.
- Copyright Protection: A copyright symbol and year watermark can visually claim ownership of your work.
Understanding Text and Picture Watermarks
There are two main types of watermarks you can use in Word:
- Text Watermark: This allows you to add custom text, such as your name, company name, or a status message (e.g., "DRAFT").
- Picture Watermark: This lets you use an image, like your company logo, as a watermark.
Adding a Text Watermark
Adding a pre-designed text watermark is quick and easy:
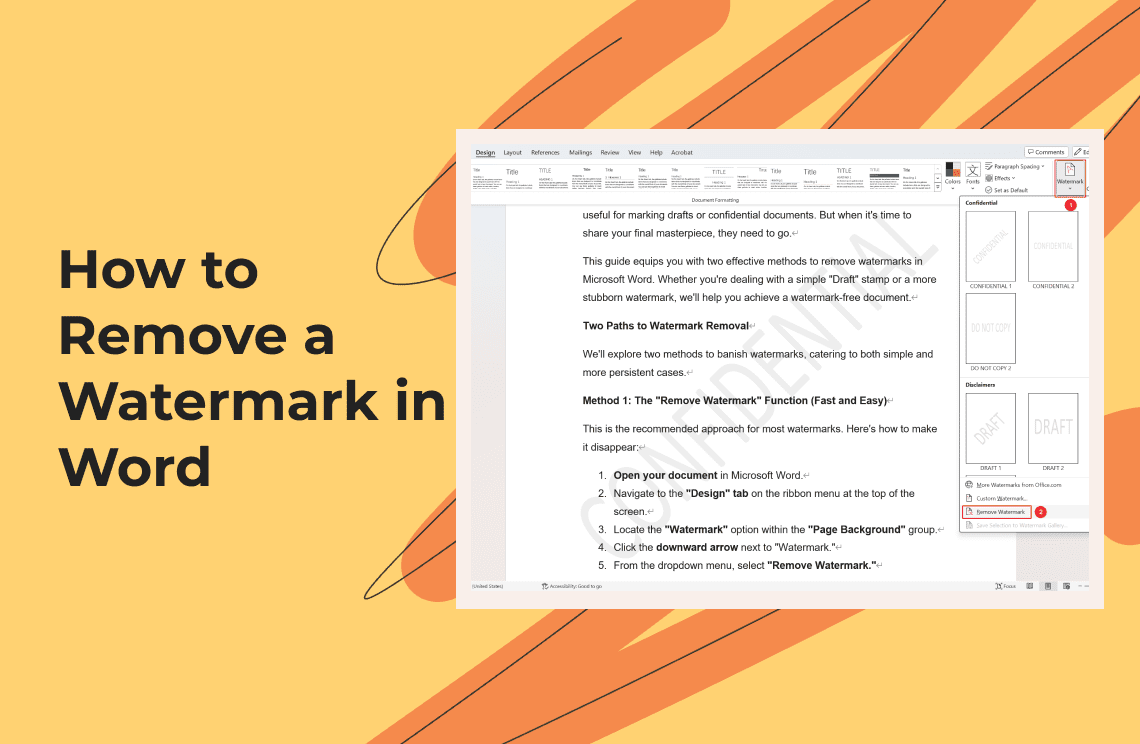
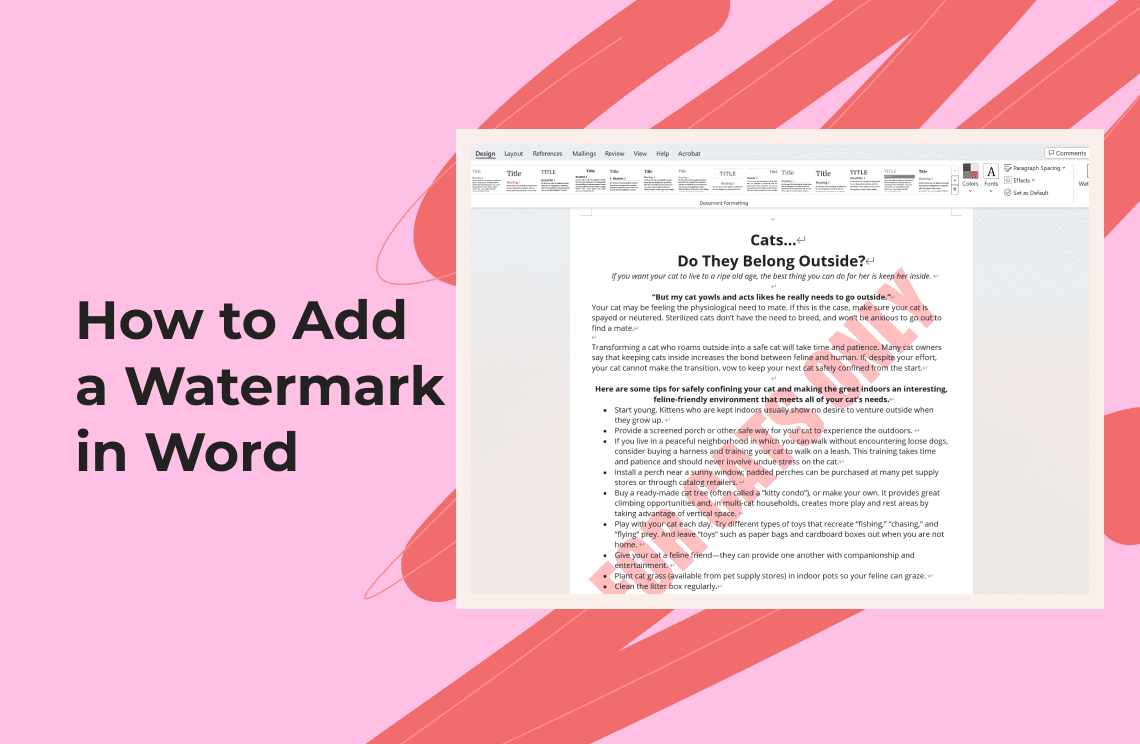
1. Accessing the Watermark Feature: Navigate to the Design tab in your Word document. In the Page Background section, click on Watermark.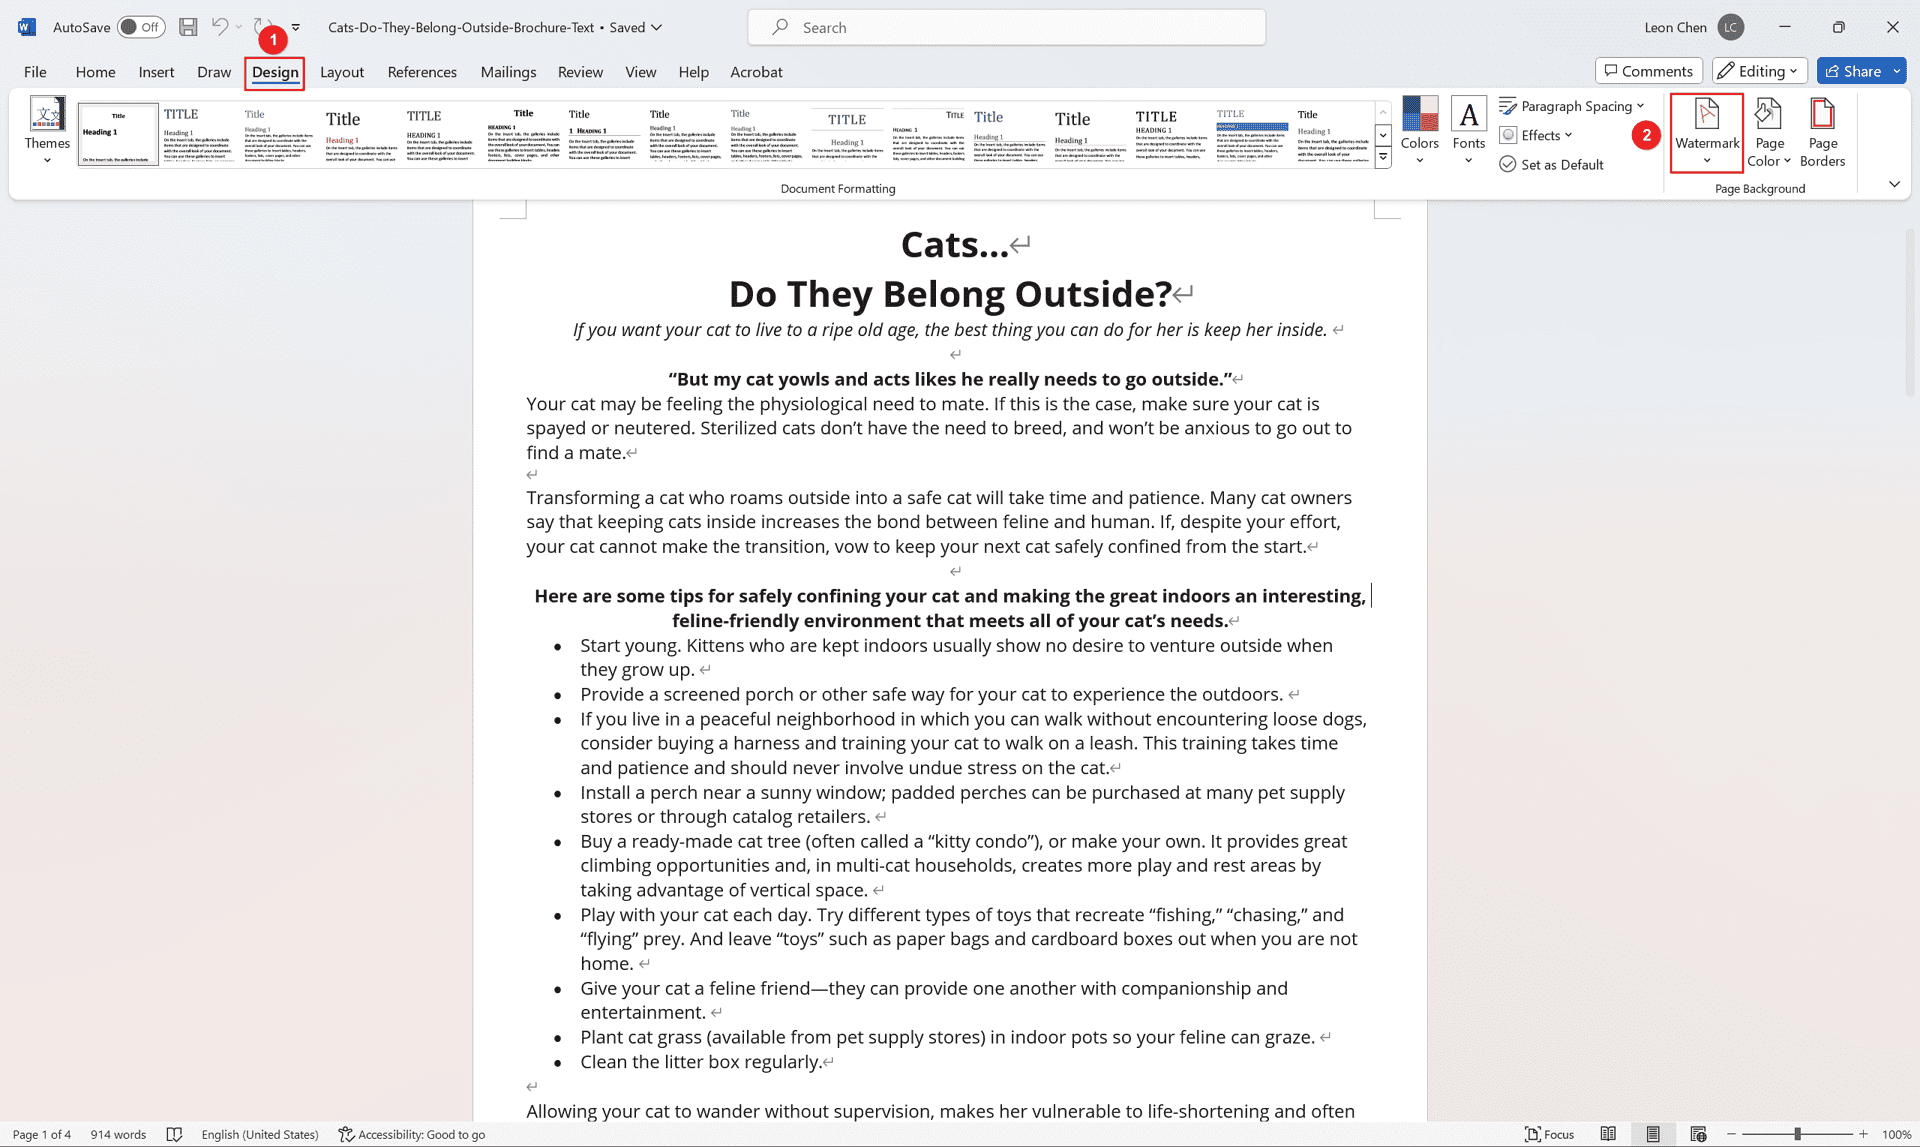
2. Choosing a Pre-designed Text Watermark: A gallery of pre-designed watermarks will appear. Select the one that best suits your needs, such as "DRAFT" or "CONFIDENTIAL."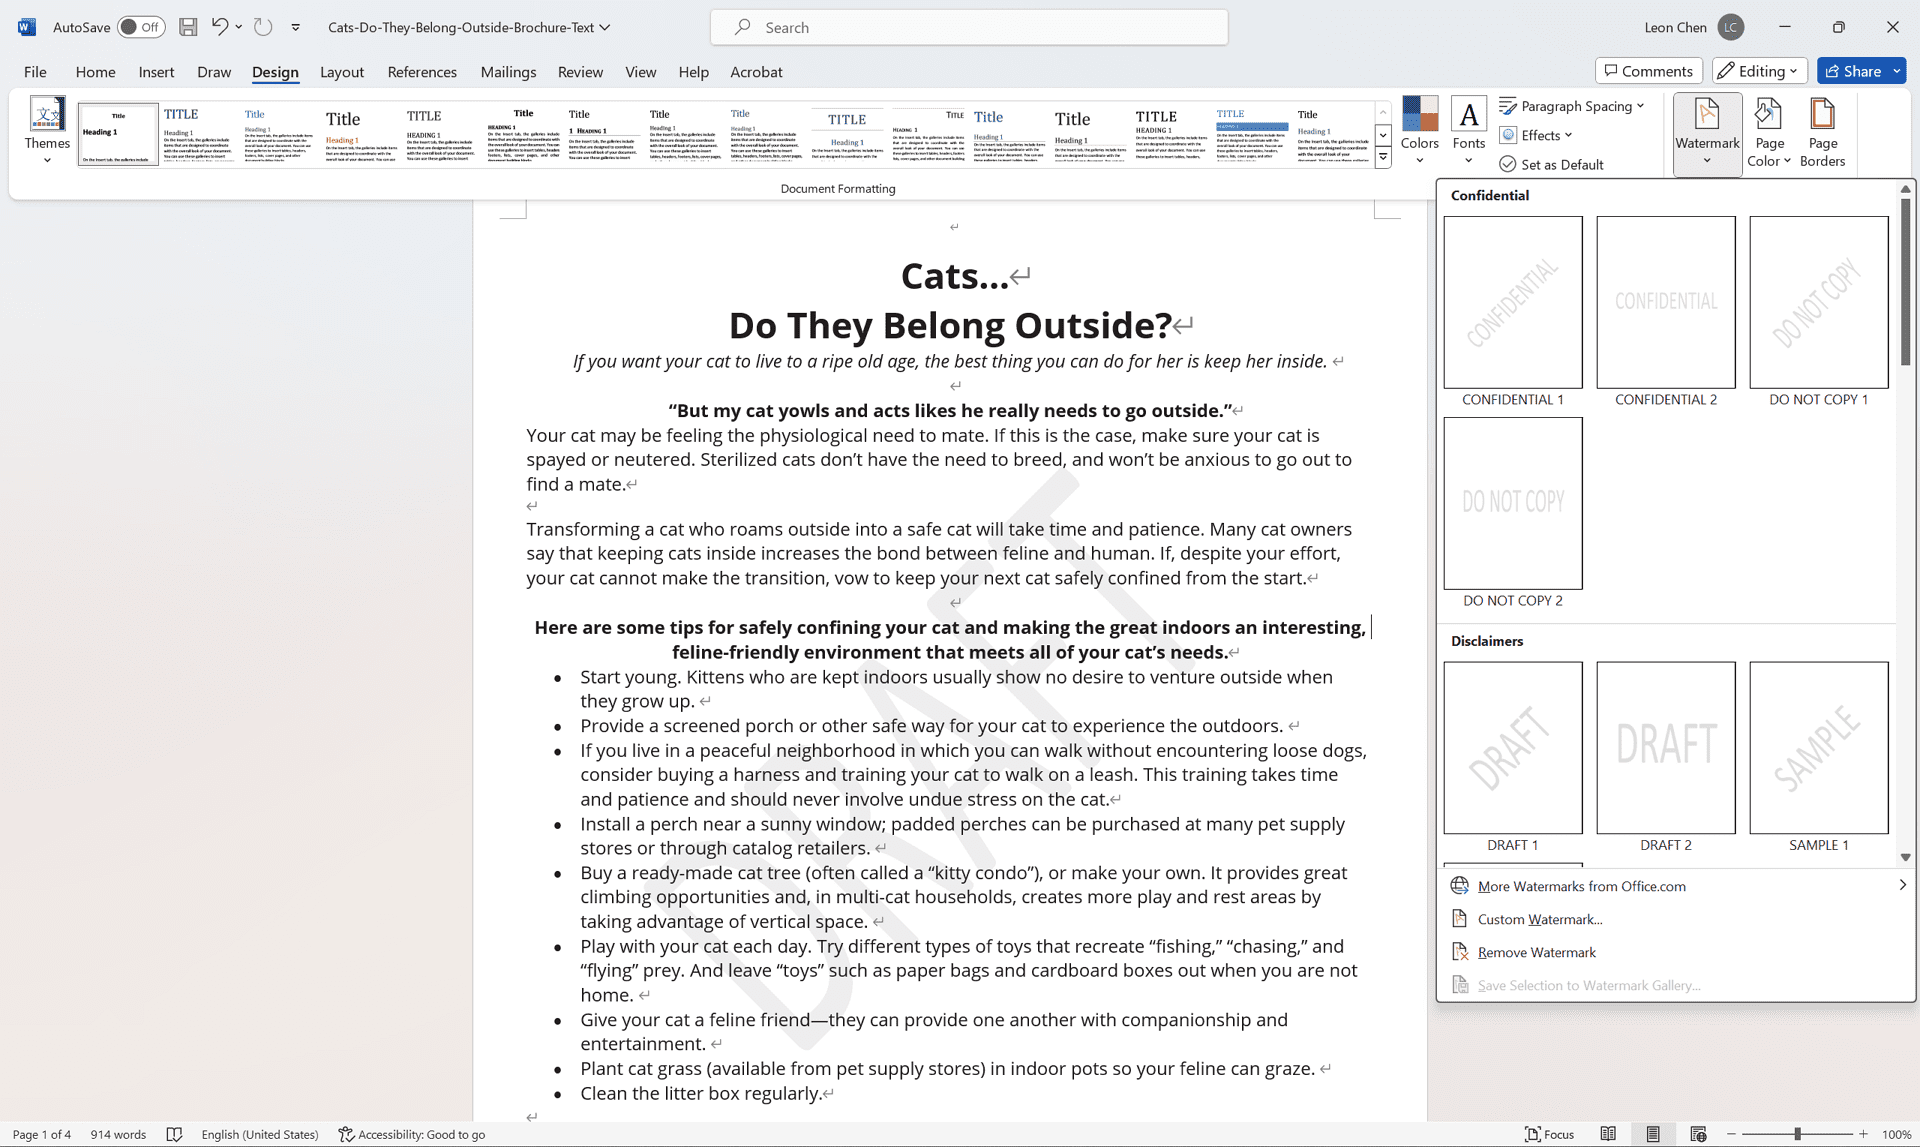
Creating a Custom Text Watermark
For a more personalized touch, you can create your own text watermark:
1. Using the "Custom Watermark" Option: Click on Watermark in the Design tab again. This time, select Custom Watermark from the bottom of the menu.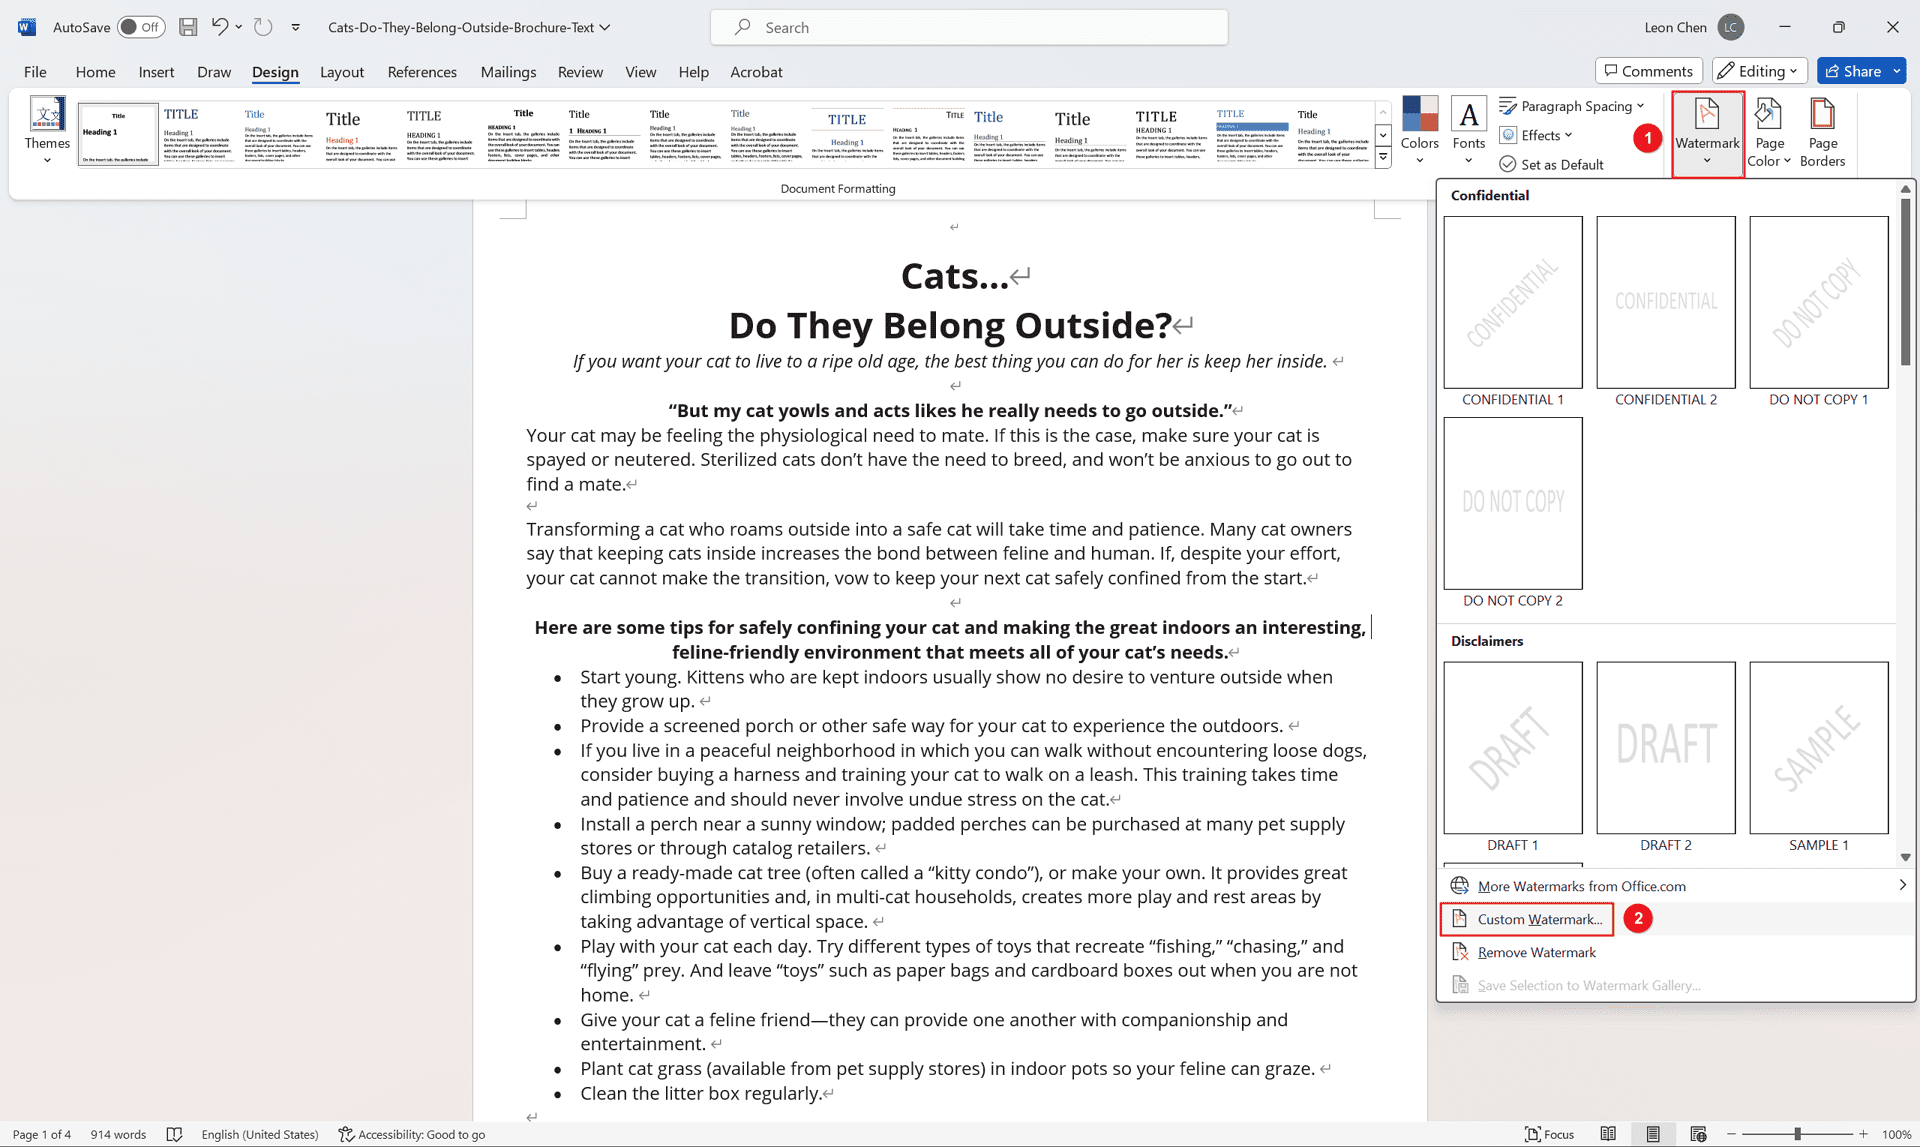
2. Customizing Your Text Watermark: A pop-up window will appear. Choose Text watermark from the options.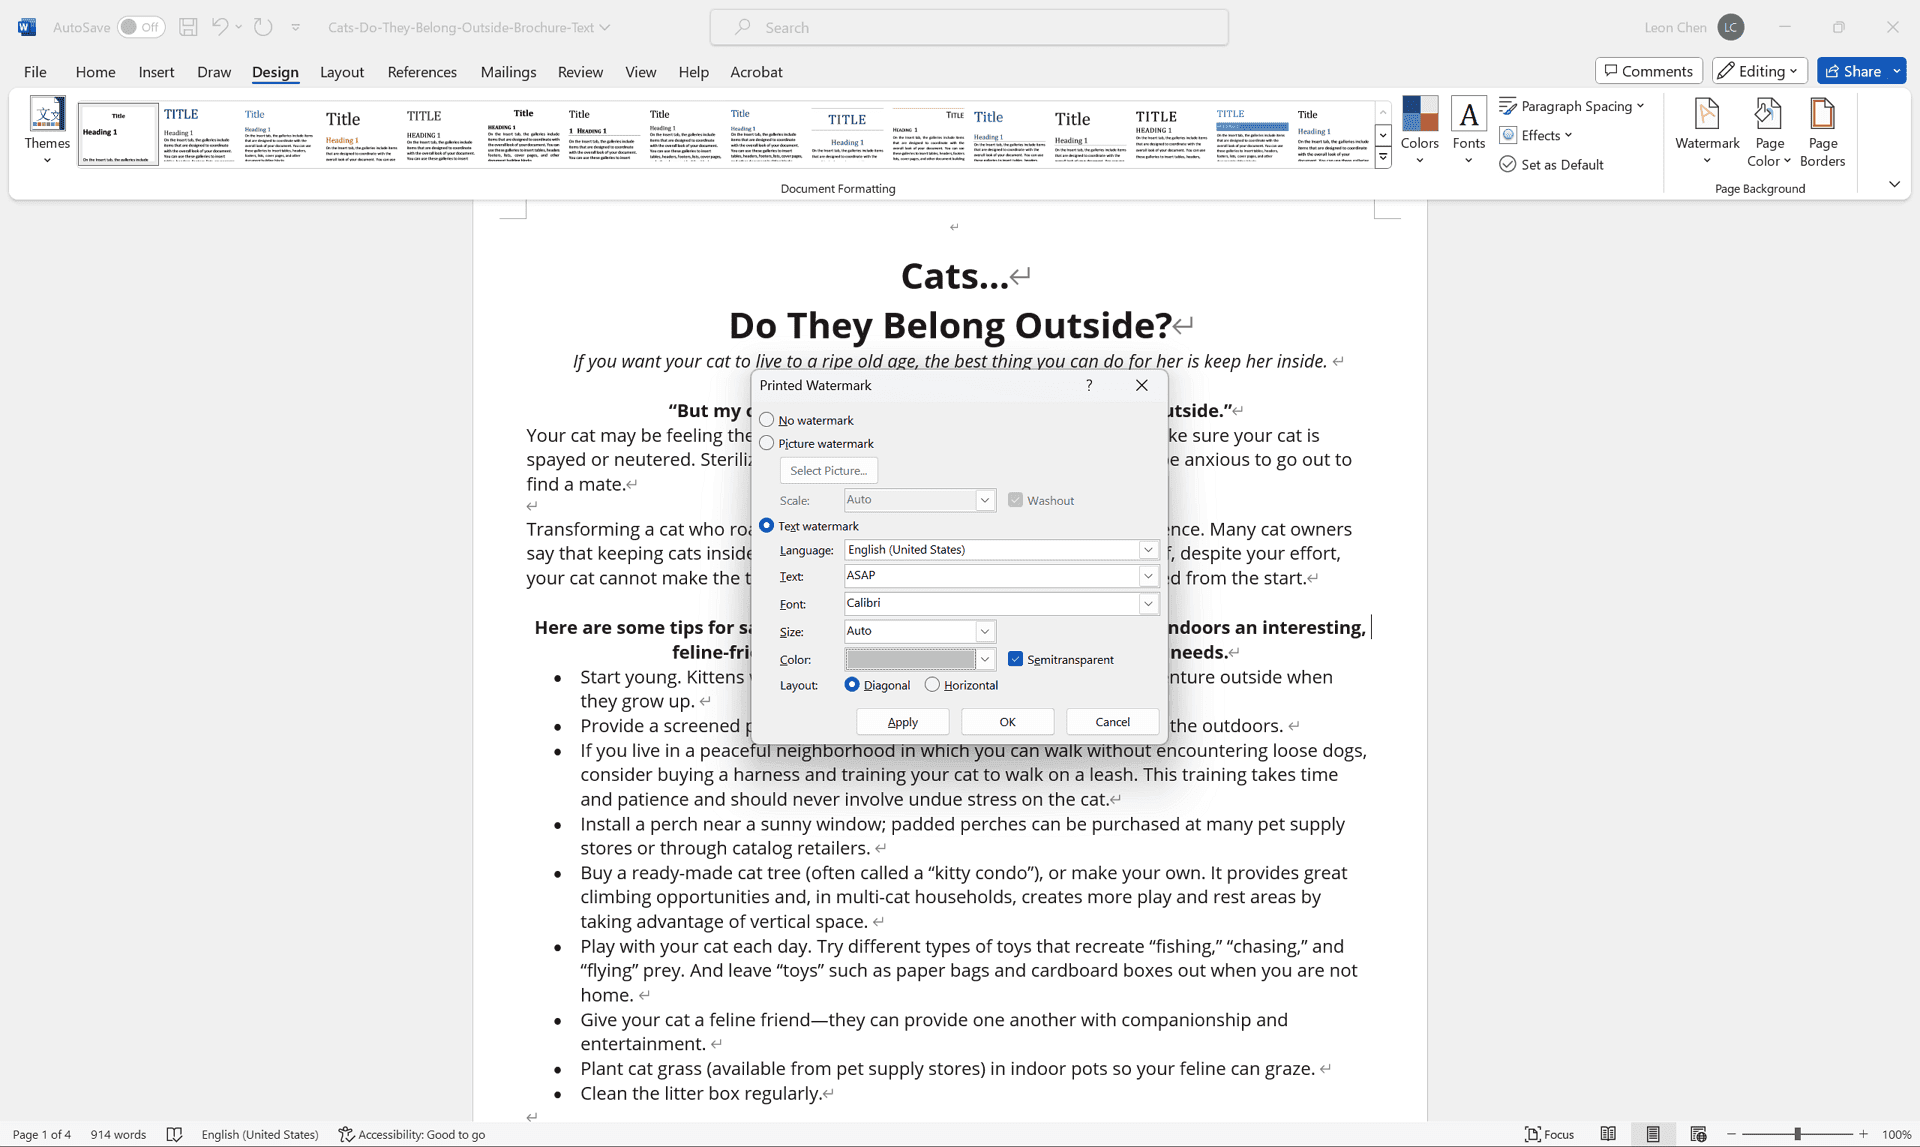
3. Entering and Formatting Text: In the "Text" field, type your desired watermark text. Use the provided options to customize the font, size, color, and orientation of the text.
4. Adjusting Appearance: Play around with the "Scale" slider to control the watermark's size and prominence within the document. Selecting "Semitransparent" creates a more subtle effect.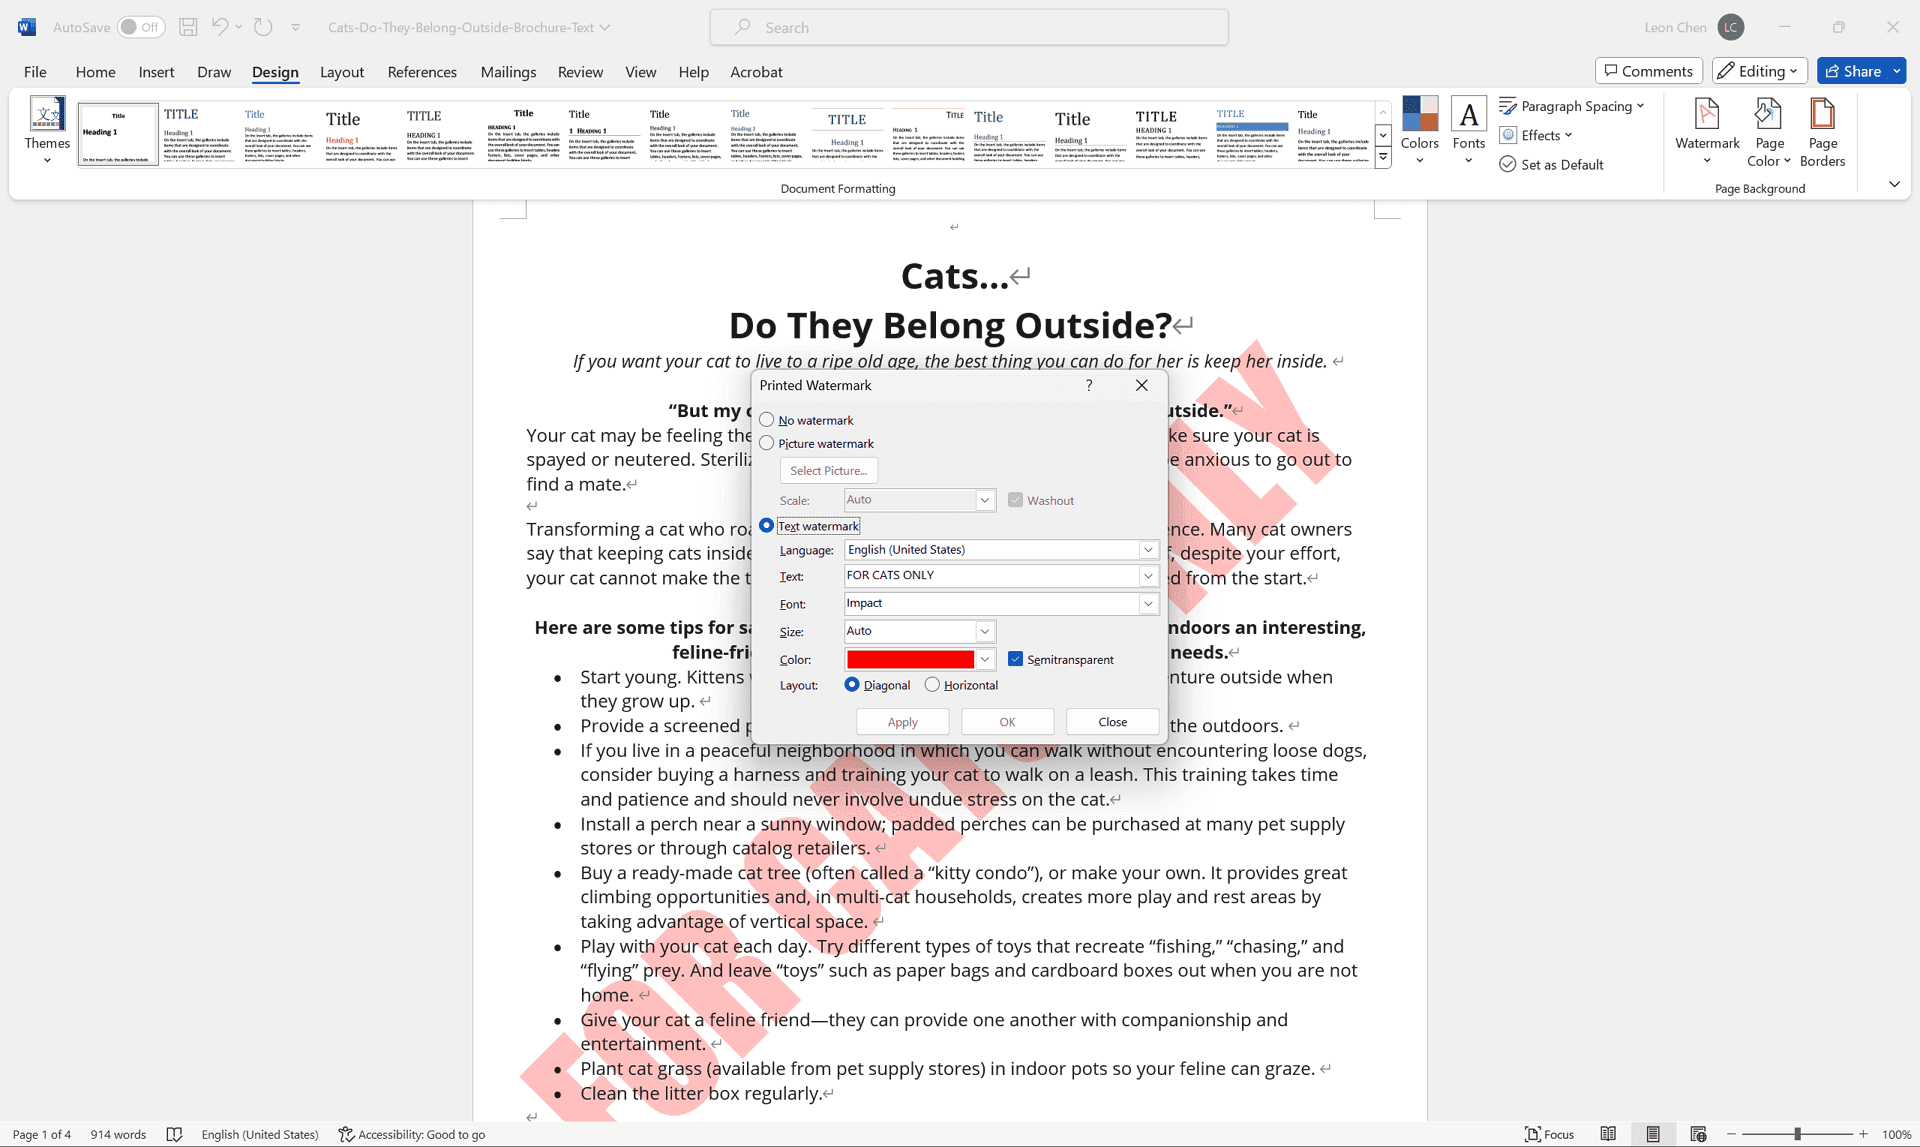
5. Inserting the Watermark: Once you're happy with the customization, click OK to insert the text watermark into your document.
Adding a Picture Watermark
Want to use your company logo or another image as a watermark? Here's how:
1. Using an Image as a Watermark: In the Custom Watermark menu (Design tab > Watermark), select Picture watermark.
2. Selecting Your Image: Click Select Picture and browse to the image file you want to use as your watermark.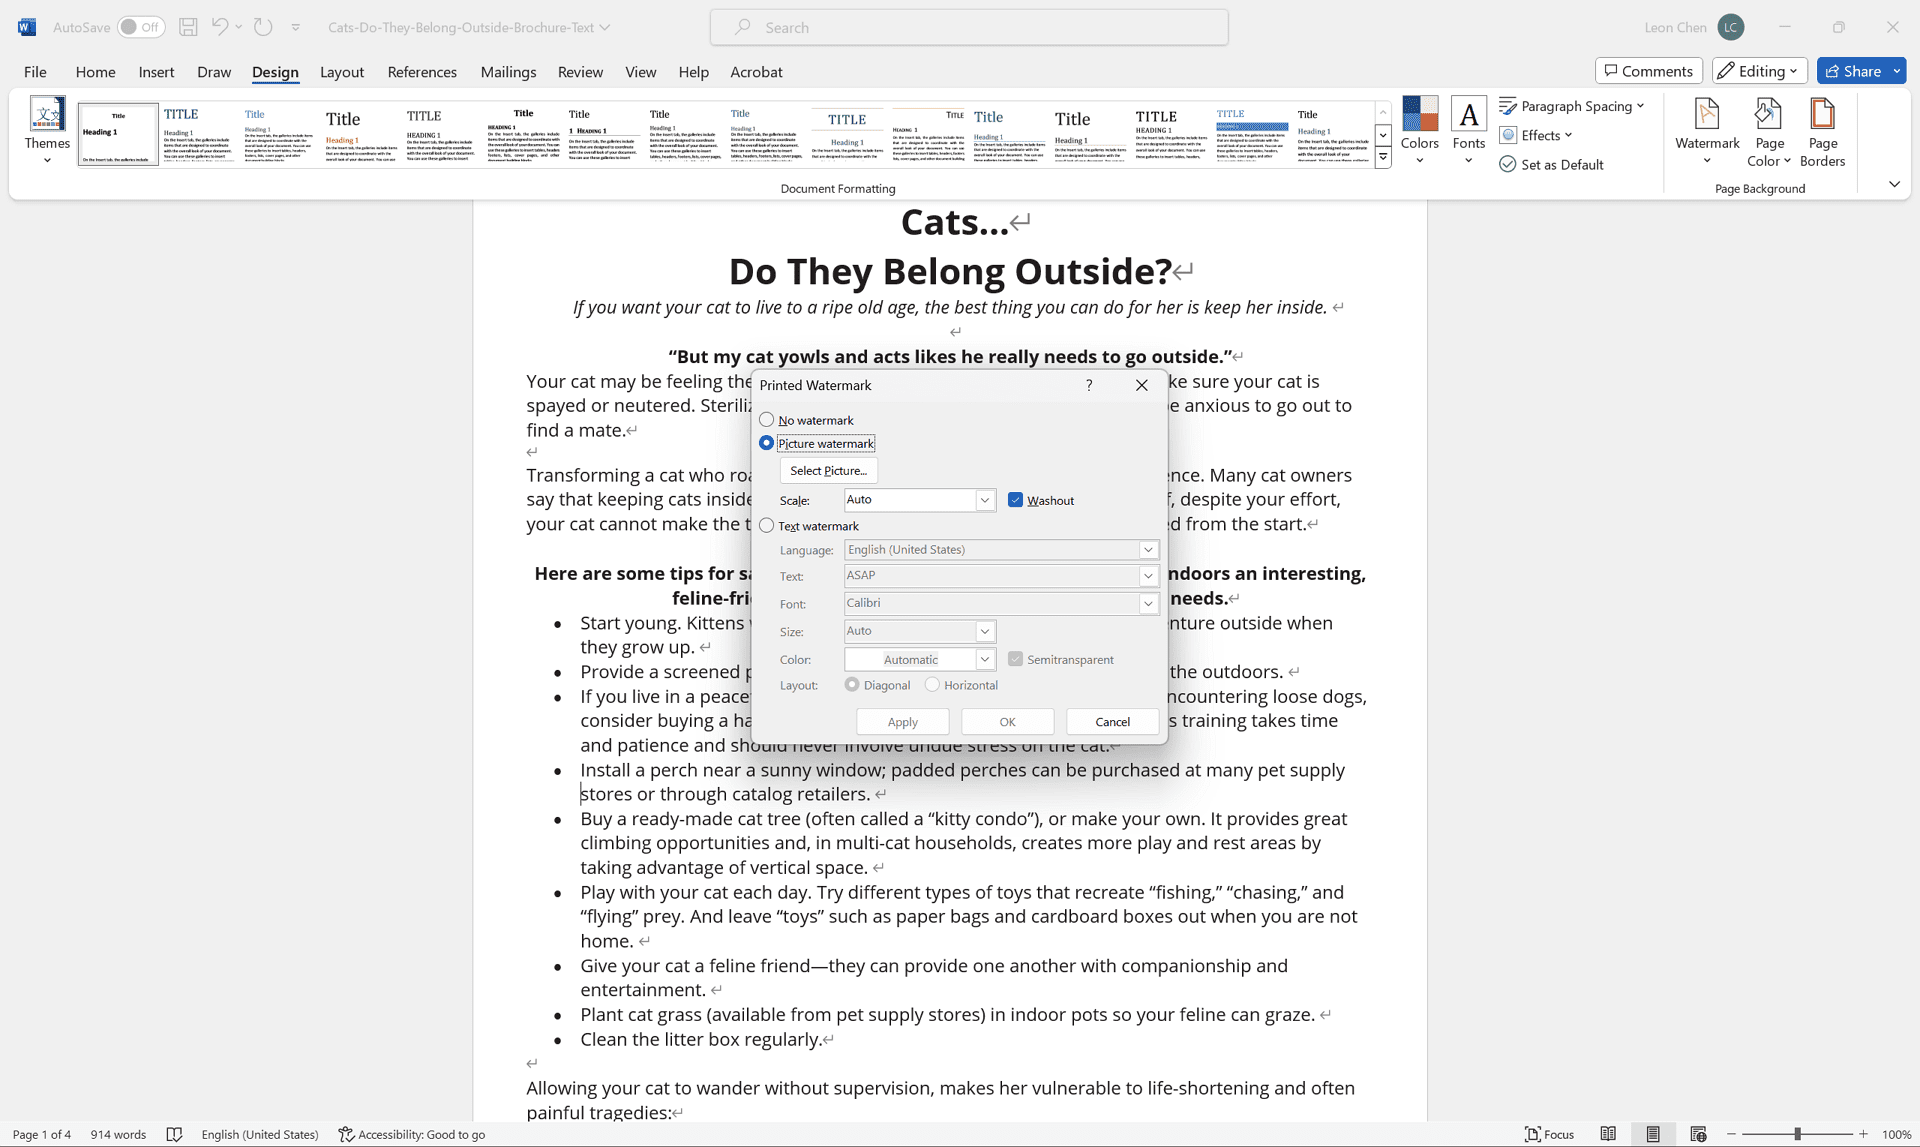
3. Fine-tuning the Picture Watermark: Similar to text watermarks, you can adjust the "Scale" to control the image size and the "Washout" slider to manage transparency.
4. Inserting the Picture Watermark: Click OK to insert the picture watermark into your document.
Additional Tips and Considerations
- Positioning the Watermark: By default, watermarks appear centered on each page. You can adjust their placement by clicking on the watermark and dragging it to your desired location.
- Multiple Watermarks: While uncommon, Word allows you to use both text and picture watermarks simultaneously in your document. Experiment to find the combination that works best for you.
- Removing a Watermark: To remove an unwanted watermark, simply follow the same steps as adding a custom watermark, but leave the "Text" field blank and click OK.
- Watermark Visibility: The "Print Layout" view in Word provides a more accurate representation of how the watermark will appear in the final printed document.
Bonus: Advanced Watermark Customization (Optional)
For power users who want even more control over their watermarks, Word offers some advanced customization options:
- Rotating Text Watermarks: The standard text watermark appears horizontally across the page. But you can add a dynamic touch by rotating the text. Here's how:
- Leveraging Header/Footer Text for Watermarks: An alternative approach is to use pre-defined header or footer text as a watermark. This can be useful for adding copyright information or page numbers that appear subtly in the background.
- Follow the steps for creating a custom text watermark (mentioned earlier).
- In the "Custom Watermark" window, locate the "Text watermark" option and ensure it's selected.
- Click the "Text" box and type your desired watermark text.
- Now, click the small "Washout" icon next to the "Text" box. This reveals additional formatting options.
- Locate the "Angle" field and enter a rotation value in degrees. Positive values rotate clockwise, while negative values rotate counter-clockwise. Experiment with different angles to find the perfect visual effect for your watermark.
- Navigate to the Insert tab and locate the Header & Footer section.
- Click on either Header or Footer to activate the header/footer editing area.
- Type your desired watermark text within the header or footer section.
- Go to the Design tab and click on Watermark. You'll notice that the pre-defined header/footer text you entered now appears as a watermark option.
- Select this pre-defined header/footer text to use it as your watermark.
Important Note: While these advanced options offer more flexibility, they might be unnecessary for most users. The basic watermark creation methods explained earlier should suffice for most watermarking needs in Word.
Adding Watermarks in Other File Formats
While this guide focused on adding watermarks in Microsoft Word, it's important to note that watermarks can be beneficial in other document formats as well.
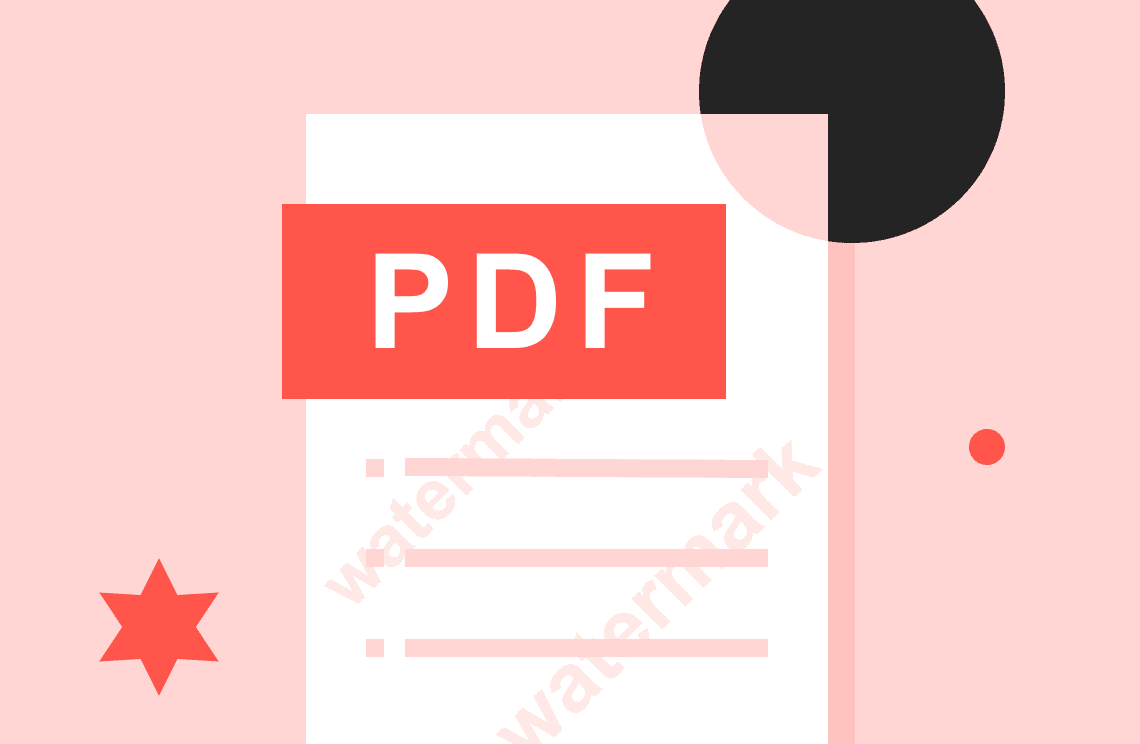
For instance, if you frequently work with PDFs and want to add watermarks for similar purposes (confidentiality, branding, etc.), there are various tools and methods available.
For more information on adding watermarks to PDFs, please refer to this helpful guide: Watermark PDFs with Ease: Online & Offline Methods https://www.pdfagile.com/blog/watermark-pdfs-with-ease-online-and-offline-methods